The call:
"Mom , I'm sending you a package"
me..."OK"
"If you can help me that would be great"
me... "Oh/"
"yeah, I HATE binding and I need it for the beginning of February"
me..."WHAT?"
"yeah, I know, it's short notice"
me... "um...I guess I have no choice?"
"Well it's in the mail"
me..."hahahahahahahahahahahahahahahahahaha:
The girl OWES me BIG!!!!
The purpose of my posts is to encourage those new to quilting! I am not an expert in any way and I am learning just like the rest of you. Trial and error. I hope that my posts motivate you and help you along your own quilting journey! I am trying to pay it forward so to speak in response to all of those quilters out there that encourage me every day! I read your posts and thank God for the internet! Ya'll are amazing! (ok....so I'm not Southern, but I am so envious of those of you who grew up in quilting homes!)
So for those of you who HATE binding...he's a few photo's that I hope will make it easier! I use 2 1/2" strips, joined together and folded and pressed in half. I start sewing it to my quilt about 12" down the binding and always start on the middle of one side of the quilt. I sew 1/2" on top and normally use my walking foot so it doesn't bunch on the bottom. (this is after you have trimmed the quilt) The corner is a new tip that I tried. Sew to the corner like so:

Then fold your binding upwards, then back down (you'll notice that my seamline is not perfect, so those "Quilting Police" can keep their comments to themselves!)
Put it back in your machine and sew from the very top down to the next corner (you'll notice that I don't do the pin thing 'cause I'm lazy!)
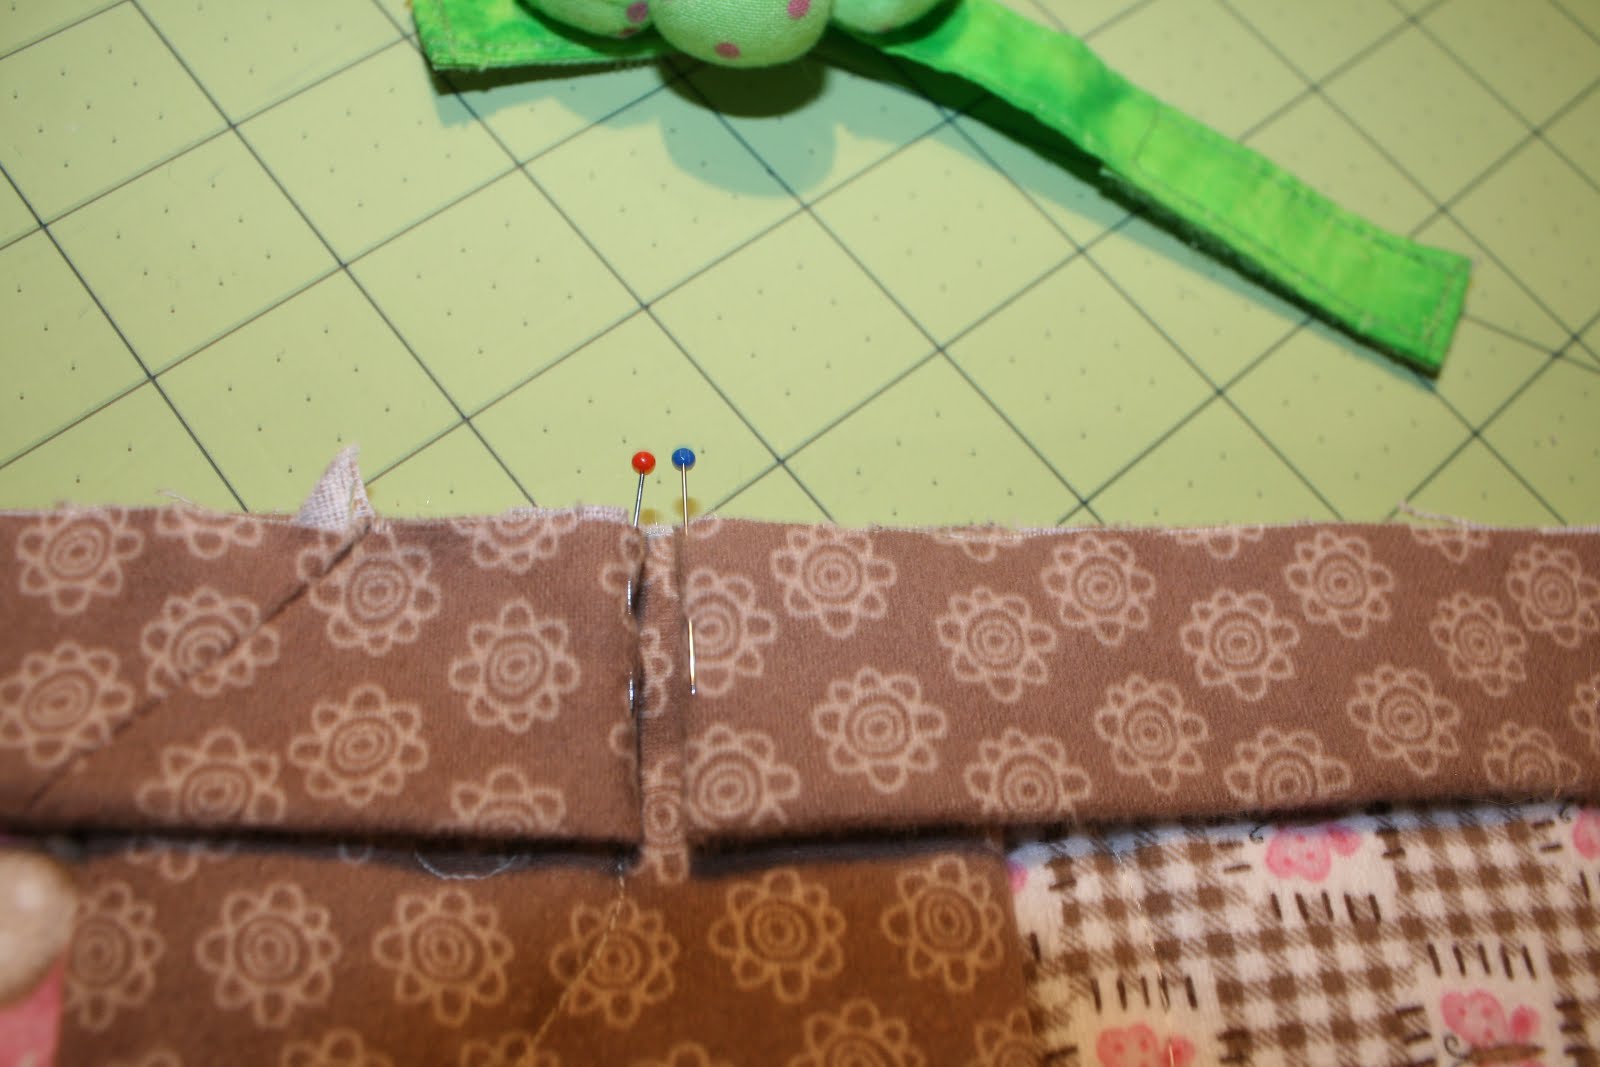
When you reach the side that you started on, end your binding with an opening about 12". You then want to fold both sides with about 1/2" open. Mark (see the pins) This is where you will sew the binding together.
Before you trim -- place the binding down on your quilt to make sure it lays flat. You want to make sure it is a perfect fit. Trust me, it's much easier to open this seam and take in a bit more if it it doesn't lay flat or there is too much binding. Once you are good to go, trim the ends of that binding to 1/4" and then finger press the seam open, fold the binding back in half and sew down the rest of the binding.
VOILA! Practice makes perfect! I hand sew the binding to the back of the quilt with small stitches, using thread that blends in with the binding. I have tried to sew the binding on in one step, but personally I don't like the look of seeing a seamline on the front and back on the binding. I love how it is invisible by taking the time to hand sew the back. Personal taste is all!
So my youngest...your quilt is now on it's way back to you. It's sure to be loved by the little wee one that you are gifting it to! Next quilt, you are on your own! I'll talk you through it!
Happy Quilting all! On to the next big "secret" project!


No comments:
Post a Comment