Sunday, March 31, 2013

Easter Fabric!

Happy Easter everyone! I realize that my tastes are in the "Old School" with traditional blocks and lighter colors. I've been admiring all those quilts with solid colors. Then I get scared and walk away from them because my free motion quilting isn't great. My mind goes to, "Sure, a solid color will show all my mistakes that much MORE!" In order to grow, and learn, I know I have to go outside of my comfort zone -- so solids here we come!


I have a couple of favorite fabric shops that I order online from because their prices are great. My most favorite is Pink Chalk Fabrics. They have a great selection and their service is great! Although ordering online is a new experience to me, Pink Chalk makes the process so simple!


My "yellow" stash was sadly lacking, so I found some great Kona cottons -- buttercup, lemon, canary, papaya and then I found a great combo by Martha Negley from the Autumn Medley - Twig Citrus.

The stash needed some more solids. Pink Chalk has a great selection to choose from. I just randomly picked a few and ended up with Chicopee Solids and of course a Kona cotton starter pack. I also bought a few yards of jet black Robert Kaufman Kona cotton. You can always use a shot of black (or at least that's what I've been seeing!)


Last night I was feeling guilty about not spending any time in the studio (S T U D I O sounds sooooo much better than sewing room! lol) I was browsing on the net and found a super simple block to do! Three seams -- that's it! The one on the right is with 5" charm squares. The left is with 10" layer cake squares. Each block takes ten (10!) minutes! With the 10" blocks in an hour and a half I can get a lap size done! What a super simple block! OK....so in all fairness, it's a little more than 10 minutes because I folded down the seams on the centre block so it's a mock cathedral block. You can see it here: http://www.youtube.com/watch?v=ZbTHlGGKMPM I love blocks that make it look like you worked REALLY HARD!

Try it out and let me know if you like it!

Oh....and don't forget the giveaway a couple of posts back. It's a little one, but I would sure like to find a home for it!

Happy Quilting!

Saturday, March 30, 2013

Quilting Toys, I mean, "Tools"

Guess what I bought today? A magazine! lol Yep, read my previous post. I'm all talk and NO action! hee he

Well, I did look through the tools I had for quilting. I had some from a way back and then some that were new. I wanted to give you my take on some of them. Hope it helps!

These are my favorite seam rippers. Of course I am a pro at seam rippin' ! I need to find the BEST! You can get this set at Lee Valley for around $20. They came in a great case and also the extra blades. I have been using these for a couple of years and have yet to change the blades. What I like about these are the blades are super thin so you don't have to stretch the fabric apart to get to the stitches. One blade has a very sharp tip to get under the thread and the other blade has a dull tip (so you can rip out faster without cutting the fabric!) Try them out, you'll love them!

Why the shot above came out in the wrong direction, who knows! I'm blog-challenged!


This little item I though would be a wonderful addition. WRONG. My Symphony only has holders that are horizontal, which would have been ok, but threading it on never worked. I tried to put it on, tape it on and it never worked for me. I would think if you have a vertical holder, it would work with your thread to the side.Don't buy one!  If you would like this little tool, give me a comment and it's yours. I'll randomly pick from the people who comment and will mail it to you. If you are the only one to comment, it's yours! I'll put it back into storage by April 13, 2013 if I don't hear from you!
This is the thread holder that works great for me. Disregard the thread that's not on the top loop -- I was dusting and not sewing. This little thing was inexpensive and can pack flat for class. It's fairly sturdy and I love the fact that the spool holders are long enough where you can put a bobbin on top of the one you are not using or put a large cone on it. I just set the spools up for you to see. Was too lazy to get the cone out and set it up. You get the idea!

The quick quarter guide has been around for years. Half quarter triangles are great. It's easy to mark on both sides, plus down the centre as your guide. They still have these around and worth the investment. You'll find lots of use for thse little rulers and they are easy to tuck into a drawer. Check them out!

This little tool is "old school". My very first quilting class included drafting cardboard templates and then when you put the template on your fabric, you use this little Quilter's Wonder Wheel to add your quarter inch seam. Now I've used this little item for school projects for the kids (drawing lovely outlines with a fine point felt pen around their projects for science fairs!) and of course with drafting templates for other projects. If you are thinking of doing your own templates and want to cut out the step of drawing that quarter-inch seam, this little item is great. (yeah, ok, OLD SCHOOL, but it's never leaving my tool box!)


These little scissors were a great little deal at Victoria's Creative Stitches. The opposite side has my name engraved on it so it doesn't walk away. Well, in fairness, it may walk away because it's so little! Maybe they will let these scissors on the plane? Any-whooooooooo, these scissors are great because you don't have to stick your fingers in to the finger holes to operate. I like being able to snip threads quickly! I love the little blades on these scissors when I am doing the little machine embroidery that I do. The blades let you get real close and you can sneak one of the blades under a single thread with ease. I don't know where you can get these, but hopefully they will start appearing in shops soon! I'd buy a dozen more! The engraving was a nice touch! I bought another pair for the youngest for her tool box. She was thrilled as they came in "purple", her fav color!


I looked at the photo above and thought, "You need a manicure! look at those cuticles!" (yeah like you never thought things like that to yourself when you look at blogs! lol)

Now, if you would like the Thread Stem, drop me a comment and Tigger will make sure that a name is drawn and you get a chance to enter this silly little give-away! Don't worry, I'll add something a little special with it so it's not so lame!

Obviously Tigger is not in a hurry to get off my sewing chair! So I wish the rest of you...

Happy Quilting!

Thanks Victoria for your email! You are the lucky winner of the "Thread Stem".
 I will pop it in the mail to you once you send me your address!
:-) Margo

Friday, March 29, 2013

Sewing Room, Organization, making "do" with what you have!

I always enjoy browsing through people's sewing rooms. I like to see how they have things set up and things that they use. So, with that, here's a tour of my little room! I'm not an expert by any means, but it's mine! Something I never had! I had many years of clearing the dining room table so that we could eat! The youngest moved out and I took over! Chef painted it a great green apple for me. The  contents are are things that I have collected on the way and re-purposed the best I can. I am grateful for my little "space". I hope you enjoy the tour and get some ideas that inspire you! Come on in!

I am limited in space, but I was left a dresser by the youngest. I've stashed craft supplies in it and it holds the tv that Chef bought me for the room. Beside the dresser and the window wall, I stash batting, pillow forms and the like.

Above the dresser I have shelving for storage of memento's and a few storage boxes for fabric bits and pieces. The birdhouse on the far right was a garage sale find with three little drawers. It's not in use, but hopefully one day I'll find a spot for it. Family photo's and my favorite items are on this shelf. The little sheep I brought back from Portugal, a few decorative thimbles. All dust collectors I assure you! My next cheap investment is one of those small photo rails (made of wood) from Ikea. It will go underneath the shelf just above the tv. The small little items can be placed on it, giving me more room to get some more storage boxes. The boxes here are from Ikea as well. Cheap and stores fabric safely away from the sun!

On the wall directly as you enter my room is full of gadgets. The boxes on the shelf above are fairly large and hold a multitude of fabric as well as specific projects on the go. The little ribbon that I have is stored on one of the rails. The small mason jar lids were screwed to the bottom of the shelf by Chef and the jars hold buttons according to color. I don't use them a lot, so I really don't have a large collection of buttons. You will notice to the right of shelf are two cans. These are compressed air cans that I use to blow out my machine when I clean. I keep them high so little fingers can't get into them, but evident enough where I know where they are.
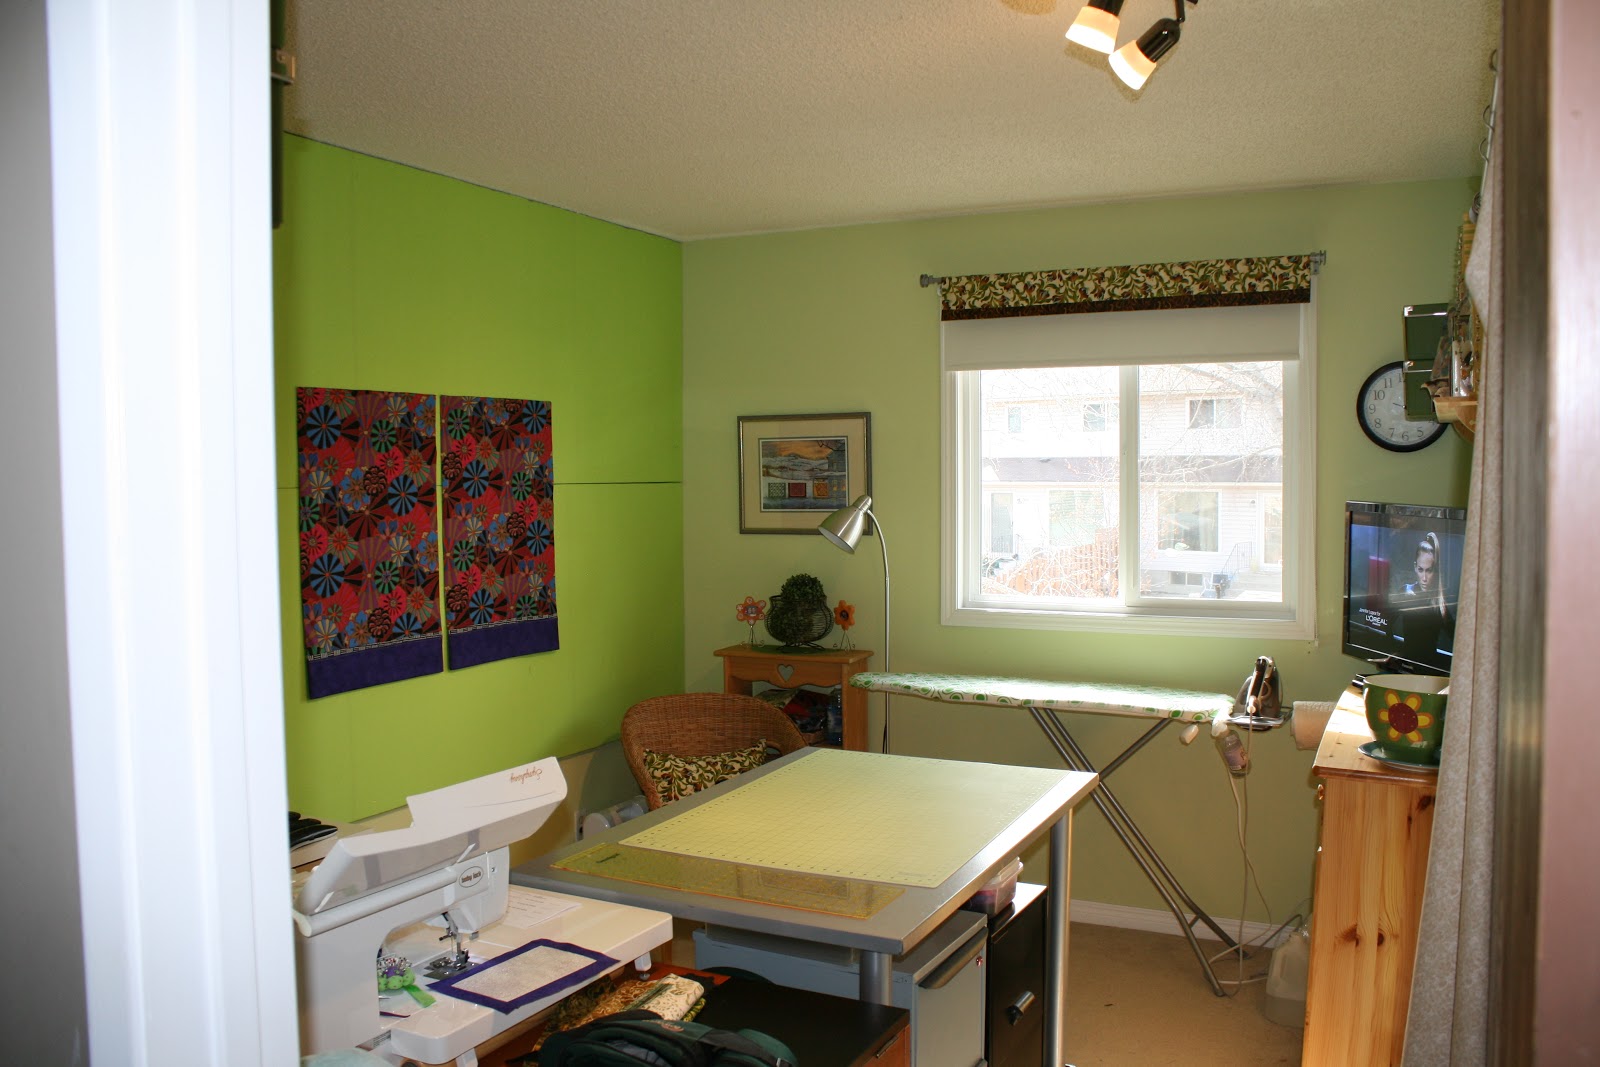
Here is a shot of the corner when you enter:
The table that my sewing machine fits on is a computer desk that I found at Liquidation World for $30. It has heavy cast legs. The top has two flip up drawers that I can stuff things in.
When the tops are down, it still gives me a great deal of surface space to work with.
The backside (side facing the machine) has three drawers that I put the little tools that I use. Now with the cords from the machine and the lamp, I do have to move cords when I need to get into the drawers (no big deal). I also have a knee lift on my machine that I have to remove if I want in the middle drawer (again, I store stuff in there that is not used on a regular basis. On the floor I have one of those chair mats for offices. It lets me move my chair easily when I have to get up as well as protects the carpet from moving around. Command strips are my friend and I have one on the Ikea table beside my sewing table to hold my little scrap bucket. I store my extra "class" suitcase underneath that I can take to classes. Every inch of this room is used as you can see. Sometimes I think it's cluttered, but I have everything in a spot that I can easily access.


My eldest made the great pottery holder. It was for kitchen utensils, but I found it was great for scissors! You'll note that I have fabric strips on some of the scissors -- those are for FABRIC only. I think everyone in my house learned that in a hurry! I've seen some bloggers put a lock on the handles. My kids complained that they didn't know which ones were for fabric and which ones were for paper. Solved that don't you think?


 Right behind the chair is one of my cupboards that holds thread. Maybe they call it a Jam cupboard? I found this little cupboard along with the other one behind the wicker chair for $20. Works for me! The little corner is where I store my Accuquilt Go and templates, and the shelf holds scrap fabric waiting to be cut into precuts.
The goose neck floor lamp gives me task lighting if I am stitching by hand or I can move it to focus on the design wall when natural lighting is low.
The photo above is just an example of using things that you already have around the house. The larger jar keeps my little odd pieces of fabric that I am saving for a special project. The black rack is a telephone rack for an office. The side compartment keeps my smaller catalogues, underneath holds larger catalogues and graph paper. Those great Crystal Lite containers to the top left side holds glues, and pens and markers.

The bookshelf beside it is "Billy" from Ikea. It holds magazines, quilting books, work books and of course fat quarters! The brass container on top is my mom's old ice bucket from overseas. It holds my binder clips for when I pin layers. Command hooks on the side of the bookcase hold the rotary cutters out of harms way from the little one.

My fat quarters I've tried to sort into colors. I'm learning and I am not an expert by any means. To give you an idea, I use my smaller 6" wide ruler as a guide for folding them. Take a look at your stash before you plan on heading out to browse. That way you will know what colors you are short of. I have plenty to keep me busy!


Can you see that I love Ikea? The drawer unit to the right of the bookshelf came from Ikea. It was in the "As Is" section for $25. It had a top drawer that was stuck and not sliding properly so anyone who tried it walked by it. I rolled that little thing to the customer service desk and asked if someone could take a look at the drawer. The guy looked at it and said "No problem!" and fixed it within seconds! It holds my thread specific to quilting as well as all the feet and accessories for my Baby Lock! The basket on the floor beside it is another garage sale find for $2. It holds odd pieces of ribbon, lace and my zippers.

The little green basket was $1 from the Dollar Store. It holds the rulers that do not have a hole to hang on the side of my cupboard. Works great and easy enough to turn from the cutting table to grab quickly. I thought about buying one of those ruler holders ($50???? are you kidding???? My $1 works just fine and gives me extra room for the remotes and cordless phone!)


The bed risers were $4 for a set of 4. They lift that Ikea table enough where it matches the extension table to the Baby Lock perfectly! The best part of this is two file cabinets fit perfectly under. (I'm on the search for another one to match either of these so the heights are uniform). The trolley holds my extra Baby Lock for classes. As the closet and file cabinets act as our "office" it's easy to access the file cabinets under the table.There is a bit of room on top of the cabinets where I store my precuts in plastic bins. Keeps them out of the way, but again, handy enough to grab when I need to.

Let's take a look at my small collection of books and magazines. I've made the decision that I am not going to buy any more magazines. I find that I hold on to them, read them once or twice and then on the bookshelf they go. I haven't taken  patterns from them, but I'm still holding on to them because I spent money on them! Storing them are a pain, but I used labels on file folders to sort somewhat. I've decided my days of buying quilt magazines is over. Blogs are great! The internet is great! Mind you, books are another thing! I do have some that I would never give up that I refer to all the time. The one on the top is Fon's and Porter's, Quilter's Complete Guide. It was the first "quilting" book that I bought that I continue to refer to. Pick and choose your books carefully. Check them out from the library first and if you keep checking it out, then invest in it. I found that magazines can also be checked out. If you find one that you absolutely LOVE, and plan on making something with a pattern from one -- then by all means buy it! Oh, did I mention that the library also sells some out of date books (aka QUILTING books!)  Remember that the money you save from not investing in these items can go towards more STASH!

I've set up my machine so my back isn't towards the door. I am focused when I am sewing and want to know when someone is coming in. I am limited with space, so I wanted to set it up so I could glance outside at the weather, but then watch the tv without craning my neck around. My ironing board is set up against the window because it forces me to get up and walk over there. I get to look out and see the world, besides taking a break from sitting. Movement is good! Having a pressing station next to your sewing machine causes you to twist your body in your chair. Although handy for sewing, repetitive motion like this is not great for your body! Take it from my physiotherapist who gave me some pointers on sitting and movement during a sewing marathon!


 There are a number of things that you need to consider when you are setting up your studio/sewing room:

1. Lighting - natural light is great, but if you put your sewing table in front of the window, you may be blinded by the sun streaming through at certain times of the day. Realize the elements as well. You can either roast like a tomato in a greenhouse or have things blowing around on your sewing table. The lighting in the room needs to be adjustable, depending on where you are setting up your cutting table and sewing area. Spend the extra dollars when you buy bulbs. A good daylight bulb may be more expensive, but it doesn't change colors on your fabrics. We bought the figure below for $15 from Home Depot. I have one of the bulbs aimed at the design wall, one on the cutting table and one over the sewing machine.


2. Furniture: Check Kijiji, Craig's list, garage sales. Someones junk can surely be your treasure. Think big picture. A dining room table set up on bed risers is a perfect cutting table (especially when you can do this for under $20!) The sewing table can be a computer desk or a kids desk. Try and think outside of the box, especially when you have to work with a budget. Don't be in a hurry. Be patient and wait for the deals. Meantime, make do with what you have. I got my adjustable chair from an office sale. It was $10! Totally adjustable for the perfect sewing height can be achieved. Don't discount dressers. You can always repaint and then make the top into your pressing station. a staple gun and paint can go a long ways in refurbishing items. Sometimes I think so many people get stuck on "matchy" items that they spend way too much money! Make it work for you.

3. Fabric Storage: Decide what's important. Do you need fabric stashed for a long time? What can work for fabric stash? (boxes? plastic bins? bookcases? dressers?) Think about how "fast" you want to access it. Bins are great, but trust me on this, you don't want to have to lift bins off of each other to get a small scrap and then have to haul everything back into place. My large pieces (i.e. flannel, fleece) are in plastic bins in the closet. They are not something that I use daily, so they are stored in the large bins. Small precuts are in small plastic shoe-size containers. Enough so that when I have enough of the scraps in there precut, I'll just sew a top and then start over again.

4. Thread storage: Now I always wanted one of those racks that go on the wall. I bought one and before you knew it, the spools were all dusty. I then had smaller racks that you could put into a drawer. It worked great for a while, but then my thread collection grew. My little storage cupboard works great, as well as drawers. I don't think there will ever be a "perfect" thread rack, but again, use what you can. I've seen people use clear cookie jars that show off all the colors. Find something that is handy to your sewing machine! Bobbins have been a pain. I've tried every type of bobbin holder, from sticks in my spool and the bobbin attached on the top. Now I am using a circular bobbin holder. If you have room, you can always arrange them on plate racks with a golf tee on the top holding your bobbin to the spool. This one is still a challenge for me, but at least my thread and bobbins are close to my machine. That's all that really counts for me!

5. Furniture placement: Be aware of where you want your back facing. If you have a view, it's great to look up now and again. You also want everything in reach that you use on a regular basis. Do you want to get up every time you need to cut something? How many sides of your cutting table do you want to access? Rather than putting your table in a corner, where you can only access from the front and side, maybe placing it in the middle of the room will let you walk all around it. Perhaps you want to put the cutting table beside or behind your sewing area so you have support when sewing larger items? Consider the weight of your furniture as well. Remember, you don't want to be moving grandma's old 200 pound table around on a regular basis! Can you put a dresser in front of your sewing table to give more room for sewing as well as provide you with much needed storage? For me, my light Ikea table can be moved off the risers so that a friend can sew with me as well. The one great thing about my little room is I can slide the Ikea table into the area between my sewing machine and bookshelf and thread cupboard. I can then move the file cabinets underneath it. It gives me enough space where we can inflate a queen size bed for an extra guest or two when the guest room is also being used. It works and all my "stuff" is still safe! When our house is loaded with guests, I'm not going to have time to sew!

My "studio" is a work in progress. I find things, I get rid of things, I change things. Do what works for you! Re-purpose and re-use whatever you can! Afford what you can buy when it comes to the tools of your trade. Buy good fabric, buy good thread. Spend money on a good rotary cutter and rulers that will be used over and over again. If you find good boxes that you can cover with scrap paper (or color code), do it! It's cheap and it works! I found an old cutlery tray that works perfect in one of my sewing machine drawers! If you have any more great idea's to suggest -- comment! You never know who will find your tip to be the greatest!

Happy organizing!

Saturday, March 23, 2013

Finally! Motivation!

  • It's taken a long time, but I think I finally have the motivation that I've been lacking for a while! Good news -- my niece is well on her way and out of the hospital. She's still off work, but little by little she's getting better! I've made another pillowcase in her favorite colors to make her recovery a bit brighter!
  • My mom was released from the hospital and they have delayed her heart surgery -- BUT, she LOVED her pillow case. I think she was surprised and pleased all the same. Something "little" to take her mind off the surgery. She will be going back in in a couple of weeks, but at least I'll have a couple more completed by then! She's started the Sashiko kit that I bought in Victoria.....and I think she likes it! I wanted to get her something to take her mind off the surgery. She used to crochet these beautiful wallhangings out of the cotton thread depicting scenes such as deer in the forest. Talented lady of course! Maybe that's where I got the creative bug? Or it could be the woodworking from my dad?

I loved carving the "Tree Spirit's" but didn't love it as much as I do my quilting and sewing.
Who knows, maybe one day I'll pick it up again?
  • The big project the last couple of days has been finally finishing a long-overdue quilt. This is one of the most challenging one's that I took on. It's based on "Lady Liberty Goes to Hawaii" by Karen Stone. When my oldest saw this in the late 90's she wanted it for her own. The only thing is, all those squares took FOREVER! Forever because I was not as confident with my sewing skills as I am now. Then she announced she wanted it for a queen-size bed. When I finally dug out some of the squares that were completed, I was convinced it would take another 15 years to get it to queen-size, so I improvised and made it my own. The fabrics are many, and there are plenty in there that have a special meaning to her as well as to me. If you've been following the story, you know the rest! So, it will head off to Karen, my long-arm quilter in Airdrie! She's the owner of "Queen B Quilting Designs". Yes, I say "my" because I wouldn't think of taking it anywhere else. I am hoping that she'll have fun dreaming up what to do with it.
  • I always avoided mitred borders -- but I tackled it this time. I don't know what the issue was really because it was pretty straight forward! They turned out great -- that is after I had a cup of coffee first!


My sewing space sure shows how small the room is. I'm thankful that I have a "room" and at least there is enough space to line up the sewing table, cutting table and ironing board together. It sure helped on putting the border on the longer sides. The top measures 70" x 100". I had to work in those tree's. When I tried to make the sides wider and place the tree's sideways, anyone that saw them commented that they didn't get why the quilt had "arrows" on it! I solved that in a hurry, but it narrowed the quilt and elongated it. Good thing the Quilt Police don't visit my place!
The top will look fantastic once Karen is done with it. I'll upload a photo once it's all done with the binding and all! Now ignore the bed and the headboard in the photo -- it's not going to be there for it's final destination! The quilt itself turned out a lot lighter than I thought it would. The blocks without borders made it all look quite dark and ominous -- I am loving how the light grey lightened up the whole top!

Of course I had to sew up some wild pillowcases to go along! The main fabric on the pillowcases is the fabric that will be on the back of this quilt! Love my design wall! Makes everything "pop"! The photo is a bit bigger hoping that you can see the barely there strip of  accent fabric --the black and white will be used for the border on the quilt.

I have learned something once again! Cotton thread! Who knew it was so fuzzy? My sewing machine now needs a good cleaning after getting this top together. No worries, I DID clean it through the process, but now it needs one of those "take apart" cleanings before I start my next project!

Happy Quilting all! Thanks for visiting!

Margo

Saturday, March 16, 2013

Worldwide Quilting Day

Well today is the day for "official" quilting! I had great intentions of doing the same, but I had some other priorities on my plate that involved sewing! Two of my family members are having some major health issues. My niece (one of only two) is in the hospital for the past two weeks. She's been really sick and they have been tossing the idea around that she "may" have lymphoma, and then in the next breath they say their tests are "inconclusive". With that said, I needed to cheer her up a bit and made a pillowcase last week -- and another this week with her favorite colour -- blue. Now within days, my mom is going in for heart surgery. She as well will need cheering up, so I made a pillowcase for her.


The fabrics are funky, but at least they are different enough to make those ugly hospital sheets go away a bit! I have stitches on my Symphony that I haven't tried and I thought that it would be a nice touch to put a little decorative touches on them. The batik pillow is a bit dark for my liking, but it's what I had around. The other pillowcase that I made for my niece last week was quite a bit brighter, so this is again another bit of a change. As for my mom's -- I thought a bit of greenery would be good. I know I need the practice! What better than to do it on something small!

I hope you all had a wonderful day "quilting" or stitching!


Monday, March 11, 2013

Victoria Creative Stitches

Chef and I travelled to Victoria to see the boys and to check in at Victoria Creative Stitches. As a Calgarian, I am giving my honest take on it. I will preface this with, this was my experience and perhaps others had a different experience. 

It was held in an arena area which had great parking as it was across the parking lot to a mall. I went on Friday, so everything else was on the go --- daycare, kids programs, hockey, etc. The venue itself seemed great, but the entrance to the arena where they had the show was not marked well. Thank goodness they had a table inside the doors manned by soneone to direct you to the actual entry to the show. We got to the entry to the show only to have people lined up to the double doors with only one door open. This one door was for people to go in and out. As there was a lineup, it created mass confusion. Some people paid in advance, some people had to give their payment, creating a clog right at the door. The table was approximately 4 feet from the door, so there was no "going around" people to get out or to go in if you already had your  hand stamped. Maybe this was a first for them? Ten dollar entry for husbands as well. How about letting hubby in for FREE? Think of it, they are the one's that buy the BIG presents for us. I'm thinking that they need a little tender loving care. How about giving bigger discounts to the spouse when they come in? Just a thought!

Classes cost $10 per person and seemed on Thursday to be limited in attendance. It was difficult to find the classes as they were not marked very well (note that I am comparing this to Calgary's show where the rooms are clearly marked above the curtains). Maybe they were marked, but I must have been blind (note that I wasn't in the classes, so I mostly likely wasn't paying attention).

I did have a big "ah hah" moment though when I went to the Hammel's booth. I remember picking up fabric from there at the last show here in Calgary. The boxes containing all those fat quarter's were pretty much the same. There was so little new in lines of fabric for the fat quarter's and the lineup to the checkout was ridiculous! Good for them! They made the cash they needed as a business, but myself, I didn't see too much new around there.

What was "new" to me was the Sashiko booth - A Threaded Needle. Susan was great and gave me a mini demo of how to proceed. It was great and prompted me instantly to get a few little items to start this and see how much I liked it. It seems as though it may be easy to take along when you have time on your hands waiting! Thanks to Susan who was so welcoming and drawing people into her booth! I found a beautiful wooden quilt rack to hang on the wall. I have a perfect project for it!


I decided against going back to the show on Saturday and went searching for other quilt shops and found Bib n' Tucker Quilting in a little area by a cement plant. I would have never gone into that area searching for a shop, but I was determined! We found it and sadly it was closed.

On Sunday, we went to Satin Moon Quilted Garden and found some great fat quarters that I haven't seen at the show.  There shop was very close to all the tourist attractions, but when we got there on Sunday it was very quiet and it took a while before someone came to ask if we needed asssitance. Perhaps they were tired from the weekend? Chef found some great "fish" fabric that I scooped up.


The Secret Workshop was being manned by what I would call a "runner". He had his west coast running gear underneath his t-shirt. It looked like it was the LAST place on earth he wanted to be, and his booth was a little lacking in people -- except me! I figured since it wasn't swamped with people I'd be able to have a good look-see and maybe cross off some of those items on my list! I managed a few marking pens/pencils and I've been wanting to try the bondable tape for pieces of batting (much cheaper than the other booths I must say!)

I'll have to see how this works!


Guess who's going to do some more free motion?


The marking tools...and oops some fabric ribbon from A Threaded Needle
 
Sunday, we travelled back to Bib n'Tucker Quilting. Though it was is an unusual area (for me...the big city girl!), it was packed with yummy fabric! We were in single file between the rows and had to step into little aisles to let people pass. Did I mention how friendly everyone was? With the exception of a grumpy little blue-haired lady who was in front of me, adding bolts and bolts and demanding that the bolts were on sale (if not, she'd leave in a huff and find another bolt!). Chef and son were waiting for me in the Brew Pub across the street. Now if that's not GREAT planning for quilt shop, I don't know what it is! Anyways, I found some great little fat quarters to add to my stash and of course bought a few meters of the black and white's that I'm adding to and a couple of meters of a basic grey for "Science Project" by Jaybird Quilts.


Of course I found other fabrics at the show, but I forgot the booth where I bought these. I bought twelve fat quarters for $20 -- When I went to one of the other quilt shops, they were charging $4.95 for a fat quarter. I know people want to support their local quilt shops, but seriously? Five bucks for a fat quarter? I'm a frugal quilter when I am building my stash. For fabric to "sit" there, I don't want it to  be breaking the bank. I have enough fabric that breaks the bank as it is!
All in all it was a fantastic weekend! We went to some amazing restaurants with the boys. Of course the boys were thrilled to be having decent meals and thanked us profusely. Oh being young and single brings it's downfalls of course, but being older and wiser brings us creaks in our knees and backs when we went exploring the forests and going around the area on foot! Travelling with Chef is always an amazing experience. He's always on the look out for fabric and quilt shops for me and indulges my creativity. I'm a lucky gal!

We had a mini-trip out to Sidney (By the Sea). My sister used to live there and I wanted to see how it changed in the years since she's moved back to Calgary. It's grown of course, but mainly maintained it's small town charm. We had a great lunch at a Thai restaurant and then on the wya back to the car I stopped in the Thrift Store -- lookie at what I found!:


Wooden Spools!


Happy Quilting everyone!