Showing posts with label hexagons. Show all posts

Monday, April 27, 2015

Hexies here we come!


The hexie box has come out once again! This time I cut up a few more pieces and will continue to do so as long and my hands hold up! It's so nice to be hand sewing these little hexies in the sunshine! The spring air coming through the house and the rays of the sun warming me up as I soak up the heat and enjoy every moment!


How do you like my little snips? I'd have to go through all my posts to remember where I got them, but they are perfect for my little kit! I wonder if these little scissors would be acceptable on an airplane? Maybe I should go with my daughter to the airport one day when she flies out of Calgary and see if Security lets her through with them? EGADS...if they confiscated them from her I would be somewhat annoyed! I just found these little one's....maybe if I get a duplicate set I can experiment with Security. MAYBE....Security takes stuff like this because THEY like them and want them for themselves! hmmmmmm? Any airline workers out there that can tell if they would be acceptable or not? Drop me a line and let me know! Last time I was on a plane they took my nail clippers.....HEADLINES... hypothetically IF they were not confiscated...

QUILTER ATTACKS FELLOW PASSENGER WITH NAIL CLIPPERS!..... maybe not!

The BEST news is I can hold the hexagon pieces together with my thumb splint, which makes me very happy! It's nice to be sewing these back together once again. Maybe I'll make headway on these units while I sit with Chef and watch TV! Either that or they can come out with me when we go fishing! I can't hold the rod, but I can sure stitch away at these!

Happy Quilting Everyone!

Margo

Monday, March 30, 2015

Spring is sprung, the grass is riz....

I wonder where the flowers is?

Trust me....the background crabapple tree blooms in late May! We are not there yet, but I sure do miss the flowers! Hexies that is!
My hexie box is near empty! Time to fill it up again for evening stitching!


I started with a photocopied sheet of hexies. Free on the internet. I then took 5 sheets of plain white freezer paper {I found this was the max that is easier to cut without hurting your hand)

I then cut strips off my photocopied page and attach it to a strip of the wax paper -- remember nothing is pre-measured. Just chop a width off your freezer paper - remember, 5 sheets thick. You then place a staple through these layers in the middle of each hexie.

When you have a whole batch, start cutting along the line. This is where the # of layers are important. With more layers, your cuts can be off, even by a fraction is enough that you don't get nice matching petals when you whip stitch them together. Some people at this point will put a hole punch in the center of each hexie to make removal easier. For me, it wasn't a big deal at the end to remove the paper. It came out easily enough!

Remove the staple, discard the paper piece, unless you want to use that piece and glue onto your strip of fabric. I don't use this piece because then I would have to take out my glue and glue each piece onto the fabric. Make sure that you have shiny side down onto the wrong side of the fabric. Remember you want to be able to adhere the waxy side to your 2.5" strip, or scrap, or whatever you are using. I find 2.5 strips easy to manage and store in my hexie box.

Then place each of the hexies along your strip and press down on the paper side so the hexie adheres to the fabric.

This is the important part Morgan -- do not be in a hurry or you will slice your finger off! LOL... I do not use a ruler, I just trim enough to leave about 1/4 of an inch all around the hexie. I am using my small rotary cutter as you can see.


This is what it looks like. I tend to cut a hundred or so of these and then spend my next hexie day as a "glue" day. 

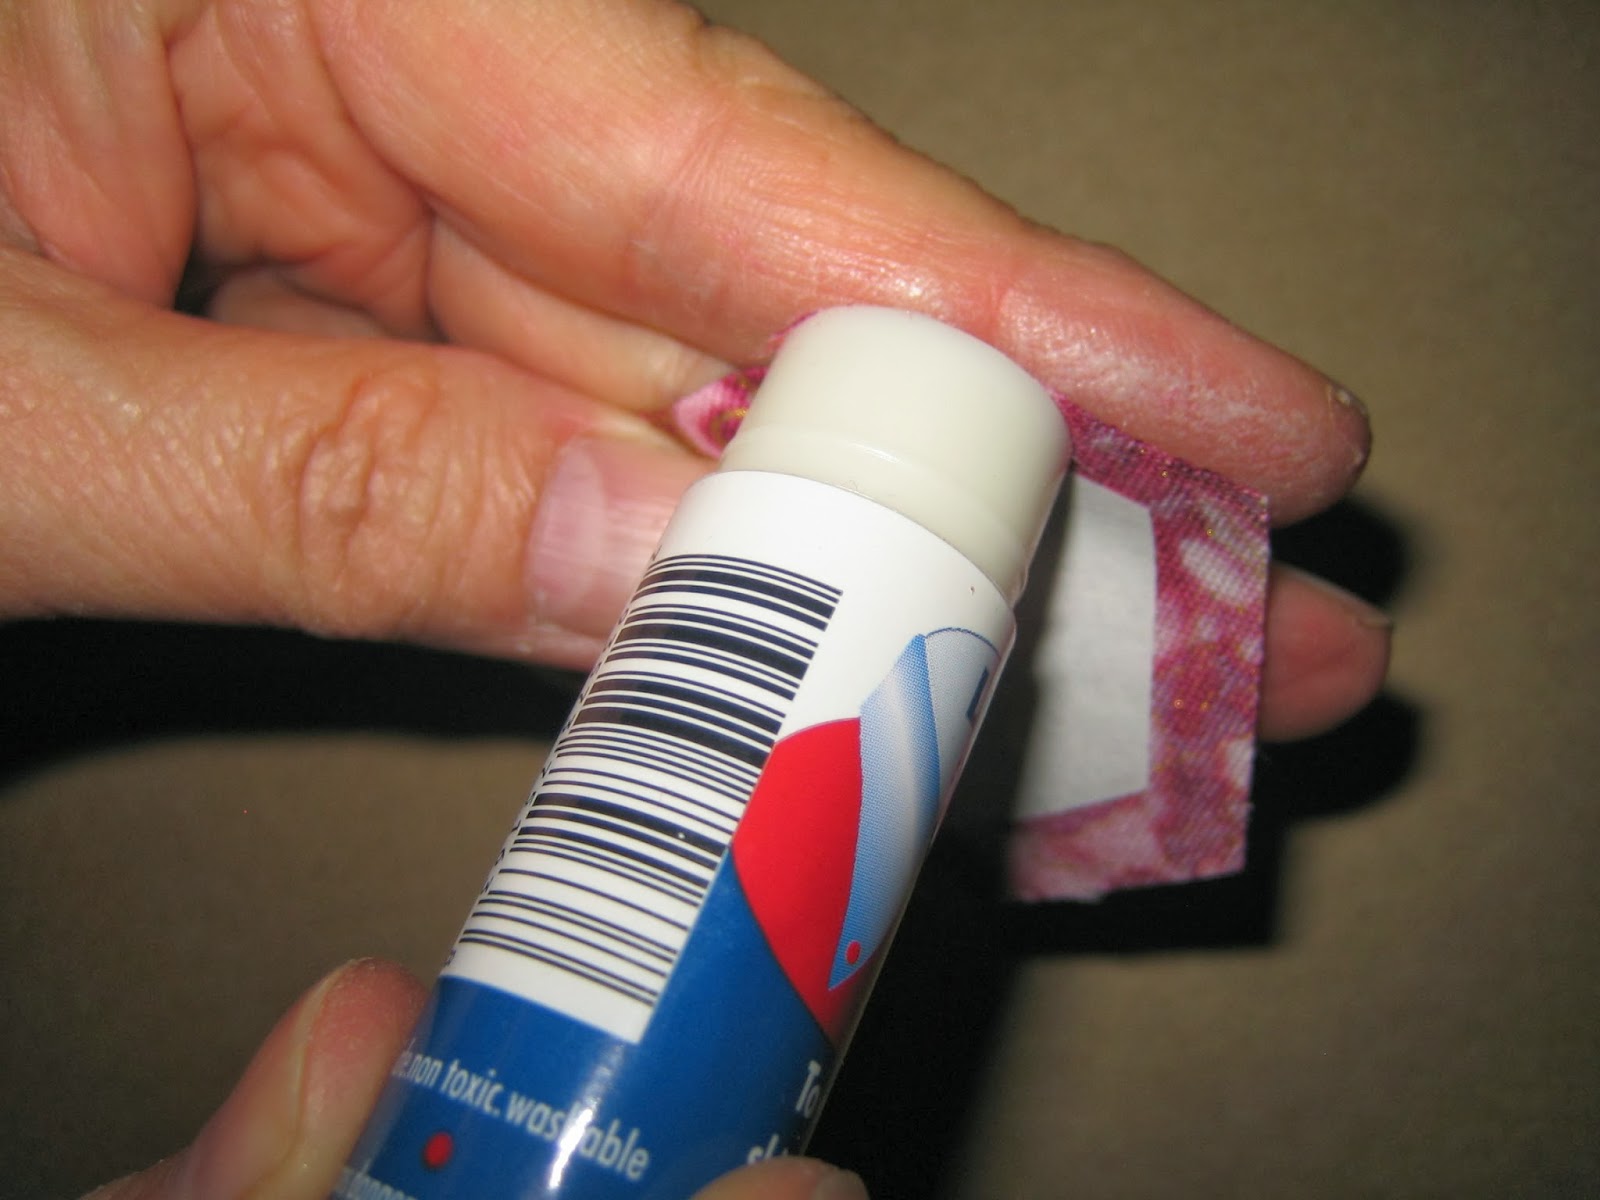
I have tried all types of glue. You name it, I bought it -- but the cheapest is Elmer's stick glue. It washes out very easily and lasts a long time. It is also easy on the budget. It's up to you, but make sure that it is washable as you don't want the residue of the glue to gum up and when it comes to quilting time, or removal time, you don't want the wax paper hexies stuck on there! You can see that I am focusing the glue on the fabric, rather than the paper.

Use your fingers to press down the edges to the paper side of the hexies - remember the wax side has adhered to the wrong side of the fabric.

Make sure you do the corner as well.

You can see the I am getting some glue on my finger as well! No worries! it washes off! I want to make sure that I have the whole edge of that fabric so it will stick where it needs to! I've even glued hexies in the car while travelling through Portugal! This is the easiest step where you really don't need to watch too carefully! I also have a couple of those wet-naps in my kit so I can clean the glue off my fingers!

Closer picture so you can see some edges are narrower than the others  It's ok if they are a bit narrower and a bit wider! It will all work out when you start stitching! You can see the corners are nice and tight. Excuse the lack of manicure! 

This hexie is ready to go!

These were the different glues that I used. The ONLY difference is all three of these are about 3-4 dollars MORE than Elmers. You pick!

Fuzzy pile of hexies!

Voila! After sticking all of them together. Once the whole quilt top is together, then I start picking out the papers.

So my dearest Morgan -- now that you know how to hand-stitch! Guess you know how to put these together! No worries! I am STILL working on this one for you!


Happy Quilting everyone! What are you doing today?

Wednesday, July 16, 2014

Hexie Wednesday!

Can you believe it? I actually am posting on a Wednesday! Sadly, I am going to let my hexies go for the summer as we finally have some wonderful weather! I thank all of you for following along and encouraging me! I WILL pick it up again in September! I promise!

So for this week, I sewed up the last hexie and I no longer have any hexies (to match that is) to sew together.


You know what that means? I AM GOING SHOPPING! hee hee! I love all different fabrics! I keep looking for things that catch my eyes!

I'll keep looking all you hexie lovers up and follow your progress! Keep on stitching! Maybe one day we will be able to show off our beautiful hand pieced hexie-quilts!

Happy Quilting!
Margo

Thursday, July 10, 2014

Hexagon Flower BOMB

Well it's Thursday and I totally missed this week with my hexagons! I was on a roll there! Anyone else in the hum drums with me?

I do have to admit that I have been doing things! Baby quilts are all in progress, but I do know that I have to take some time to work on hexagons!

Who's with me????

So tell me...how do you keep motivate on those long-term projects? How do you approach these projects? Any tips?


HELLLLLLLLLLLLLLLPPPPPPPPP! lol

On with my other projects! Hopefully I will have some hexagons to show next week!

Happy Quilting everyone!

Margo

PS...winners of the giveaway -- I have emailed you again. Looks like my other email account is not working for some reason! Congrats and I hope to hear from you soon!


Wednesday, July 2, 2014

Hexagon Wednesday! and other stuff!

It is that time again! I managed to get a couple done this week AND I did some other quilting that is a secret right now. I am hoping that my hexagon buddies can help keep me motivated while I get enough flowers for a queen-sized quilt! Maybe you want to try hexagons but were afraid to try! It's easy-peasy! Remember, I'm the quilter that does not abide by the Quilt Police Rules and will short-cut if I can. If you like to do hand-work -- try out a couple. Even if it's not for a full quilt, you can always applique a few to the back to embelish a label, or front of the quilt to give it a little extra! Take a look at my hexagon tutorial on my blog. Just check out the hexagon labels and you'll find it! Forgive me, I'm not great at all the in's and out's of blogging and posting links, so I'll have to bore you with anything labelled "hexagons" as you try and hunt it down!! I'm more than happy to answer any questions about my method. I know a lot of people out there do different things. Hopefully it will all work out in the end. I know that The Youngest won't be tossing it in to the wash and dryer all the time and will take good care of it. 


I now have a total of 144 completed flowers! I am estimating that I need at least 550 flowers -- so The Youngest is going to have to wait for a looooooooong time before she gets it! Here's a picture of how big they are when they are done (and the photo is upside down....but mind you, we all know how to read the ruler upside down!)


Birthday Girl on Canada Day was my Mum! She turned 81 yesterday! This is a peek at her flowers in her back yard. Her yard is so sheltered and is nice and private! So great to sit out there with a nice refreshing Tim Horgon's Cappuccino  and have a great chat! It's exactly what we did after we took her to dinner for her birthday celebration!


 Columbine...one of my favorites! I am hoping that I can snitch some in the Fall and plant them in my own garden!

I've been reading all the lovely comments for my giveaway! Thank you, thank you, thank you! I will be drawing on Friday and notifying the winners! You don't have to do hexie's to enter..I'm just celebrating my 100th post and wanted to pass on something to my readers! You all are the one's that encourage me when my "quilt" days are bad or when my motivation is waning!

I'm been extra busy this week as well with a gift for a baby shower this weekend! As Friday here in Calgary is starting off with the Calgary Stampede Parade, I've taken the day off. Half of which we had off due to the parade heading down our street where I work! I'll be working hard getting the rest of my quilt project completed and hopefully upload it so you can all see!

Head back to my 100th post and enter for my giveaway, if you haven't already!

Happy quilting everyone! See you for sure on FRIDAY!

Yee Haw! Stampede season is here!

Margo

Thursday, June 5, 2014

Flower Wednesday..... a little late!

Well of course I have been busy this week...and have managed to drop a button on my blog. I am learning slowly! I have to say I am fine that I have managed to add a little more to my garden with the help of my fellow gardeners! Thank you all for the encouragement! I sure do appreciate it!

I thought I could add them to the screen of my sewing room and look out at the gorgeous crabapple tree! Those blossoms are only there this week and by next it will be full of beautiful green leaves! The more flowers, the more apples to pick in the Fall! 

And....while I was sewing...these three cool dudes were hanging out together! lol.... Pretending they didn't notice me with the camera! 

Happy gardening all!

Saturday, May 31, 2014

Hexagons

Well the hexagon quilt is still going forward...s l o w l y. The Youngest will be 30 before it's done! That's ok as The Oldest turned 30 when I got her's done! So, in celebration of hexagons I have vowed to make one flower a day, rain or shine! So, in a year, I could feasibly have 365 flowers! She wants a queen sized-quilt. May God help me with this project! I haven't even thought about how many flowers I would need....and I don't think I need to really focus on that right now....I'll focus on one flower at a time!
All colors of flowers put together..

Pile of flowers

Stacked in a bread box for now

Hexi's packed and ready to go anywhere I go!

I tried to link up for a hexi-link-up -- but I am blog challenged. I would like to join, but apparently I am having more trouble signing up and getting all the tags etc., that I think I'd better focus on sewing instead!

How are you all doing on your projects?

Saturday, September 21, 2013

Hexagon madness! Flower Power! (heavy in photo's)

I am always working on one project or another! I vowed that our kids would each get a quilt made by me. One down and four more to go (quilts that is!!) The hexagon quilt is for my youngest. She's a quilter as well but hates, detests, can't stand....hand sewing! Anything that has to do with hand sewing is a vehement "NO THANKS!" ha ha! Good thing that I love hand sewing and I know that she will appreciate all the work that goes into this!
My stack with so many more to make!


This is a freezer paper hexie ironed on to fabric and then trimmed as close to 1/4" as possible (give or take....a bit bigger is a bit better!)

Use a glue stick and paste on one side of the hexie on the fabric (don't worry if you get any on your giner/ washes off/ or the paper as you will be pulling out the papers down the road)
Fold down over the edge of the paper and press firmly down from one end to the other.
make sure that you have the edges down as well as your next step will include folding the next corner down.
This is where you glue the next side to the right of the one you just glued -- or if you are left handed, you will be gluing the side to the left of the one you just glued!
Make sure you press down firmly (ignore my horrible cuticles and nailes.... I am not a girly girl when it comes to my hands!) When you press down firmly, you get nice crisp edges and nice sharp corners!
You can see in this photo that the glue is even on the edge of my finger -- trust me...you want it to be right to the edge of that fabric so that it holds! Remember, this glue will wash out and the papers will come out once all the hexies are sewn!
This is your ready-to-go hexie!
I've used all kinds of glue! My favorite is Sewline -- it's white and has a smaller tip. My next fav is the glue stick, but it's larger and I have to wash my hands more often. My last choice is Fons & Porter -- which is blue and really sticky/goopey to get off -- but works fine on the hexies. Try them and see which one you prefer!
A fuzzy pic of the hexies ready to be sewn!

The hole-punch hexies make for easier removal when you are ready to pull them out. The hexie papers above I was not going to waste!
 If you have questions, please don't hestitate to ask. I can't guarantee an instant response, but if you email me at onlydiamonds@hotmail.com -- it will get you a faster response than just in the comment section (I'm not a great consistent blogger as you can tell!) My hexies are on white freezer paper. I cut them out and iron them onto 2.5" strips of all different cotton fabric that I have collected. I use scraps, purchased jelly rolls and fabric that I've cut myself on the Accuquilt. I have even used charm squares (but find that I cannot consistently get 6 hexies for my flowers, so I tend to just cut enough hexies for my center squares.) Find a hexie size that you like. There are tons of free printables on line, or you can draw a bunch of your own on graph paper and photocopy. When you photocopy -- make sure you copy on the SAME photocopier for all your hexies. Photocopiers vary. I print out my "master" sheets that I will use to cut my freezer paper out on. I then fold my freezer paper to match the size of the photocopied paper. I then staple in the center of EACH hexie. I cut (with paper scissors, each pile of hexies. I find that each stapled bunch that I can manage easily is the master top sheet plus 4 layers of freezer paper. Once all the hexies are cut out -- I hole punch each bunch and then remove the staple from each bunch, tossing the top hexie out (some die-hards will put a dot of glue on the center and put it on fabric -- I'm too lazy and just want to place the wax side down of the freezer paper hexies and iron them on! When sewing together, use s small whipstitch. Some people use the same colored thread to match the flowers they are sewing. I use a neutral color and find that my stitches are small enough that you don't notice the thread. Of course you are going to use what you are comfortable with. Some people want to use only cotton, some people will use a polyester. Again, it is your choice. If your quilts are going to be inspected by the quilt police, you already know what the expectations are! ;-) As for needles -- my absolute favorite are Clover Black Gold Needles specifically for applique/sharps (no.12). They are specially polished with Black plating. These needles pierce through fabric "effortlessly"! I totally am hooked on these! Considering that you have glue AND fabric to go thorugh -- they just glide right through! When you can sew without any hitches, you can work on getting those nice tiny whipstiches! If you have to pay a little extra, it is worth it! If you would like to see how I prep my hexagon's before I get them to fabric, let me know! Happy stitching everyone!