Showing posts with label Grandmother's Flower Garden. Show all posts

Monday, March 30, 2015

Spring is sprung, the grass is riz....

I wonder where the flowers is?

Trust me....the background crabapple tree blooms in late May! We are not there yet, but I sure do miss the flowers! Hexies that is!
My hexie box is near empty! Time to fill it up again for evening stitching!


I started with a photocopied sheet of hexies. Free on the internet. I then took 5 sheets of plain white freezer paper {I found this was the max that is easier to cut without hurting your hand)

I then cut strips off my photocopied page and attach it to a strip of the wax paper -- remember nothing is pre-measured. Just chop a width off your freezer paper - remember, 5 sheets thick. You then place a staple through these layers in the middle of each hexie.

When you have a whole batch, start cutting along the line. This is where the # of layers are important. With more layers, your cuts can be off, even by a fraction is enough that you don't get nice matching petals when you whip stitch them together. Some people at this point will put a hole punch in the center of each hexie to make removal easier. For me, it wasn't a big deal at the end to remove the paper. It came out easily enough!

Remove the staple, discard the paper piece, unless you want to use that piece and glue onto your strip of fabric. I don't use this piece because then I would have to take out my glue and glue each piece onto the fabric. Make sure that you have shiny side down onto the wrong side of the fabric. Remember you want to be able to adhere the waxy side to your 2.5" strip, or scrap, or whatever you are using. I find 2.5 strips easy to manage and store in my hexie box.

Then place each of the hexies along your strip and press down on the paper side so the hexie adheres to the fabric.

This is the important part Morgan -- do not be in a hurry or you will slice your finger off! LOL... I do not use a ruler, I just trim enough to leave about 1/4 of an inch all around the hexie. I am using my small rotary cutter as you can see.


This is what it looks like. I tend to cut a hundred or so of these and then spend my next hexie day as a "glue" day. 

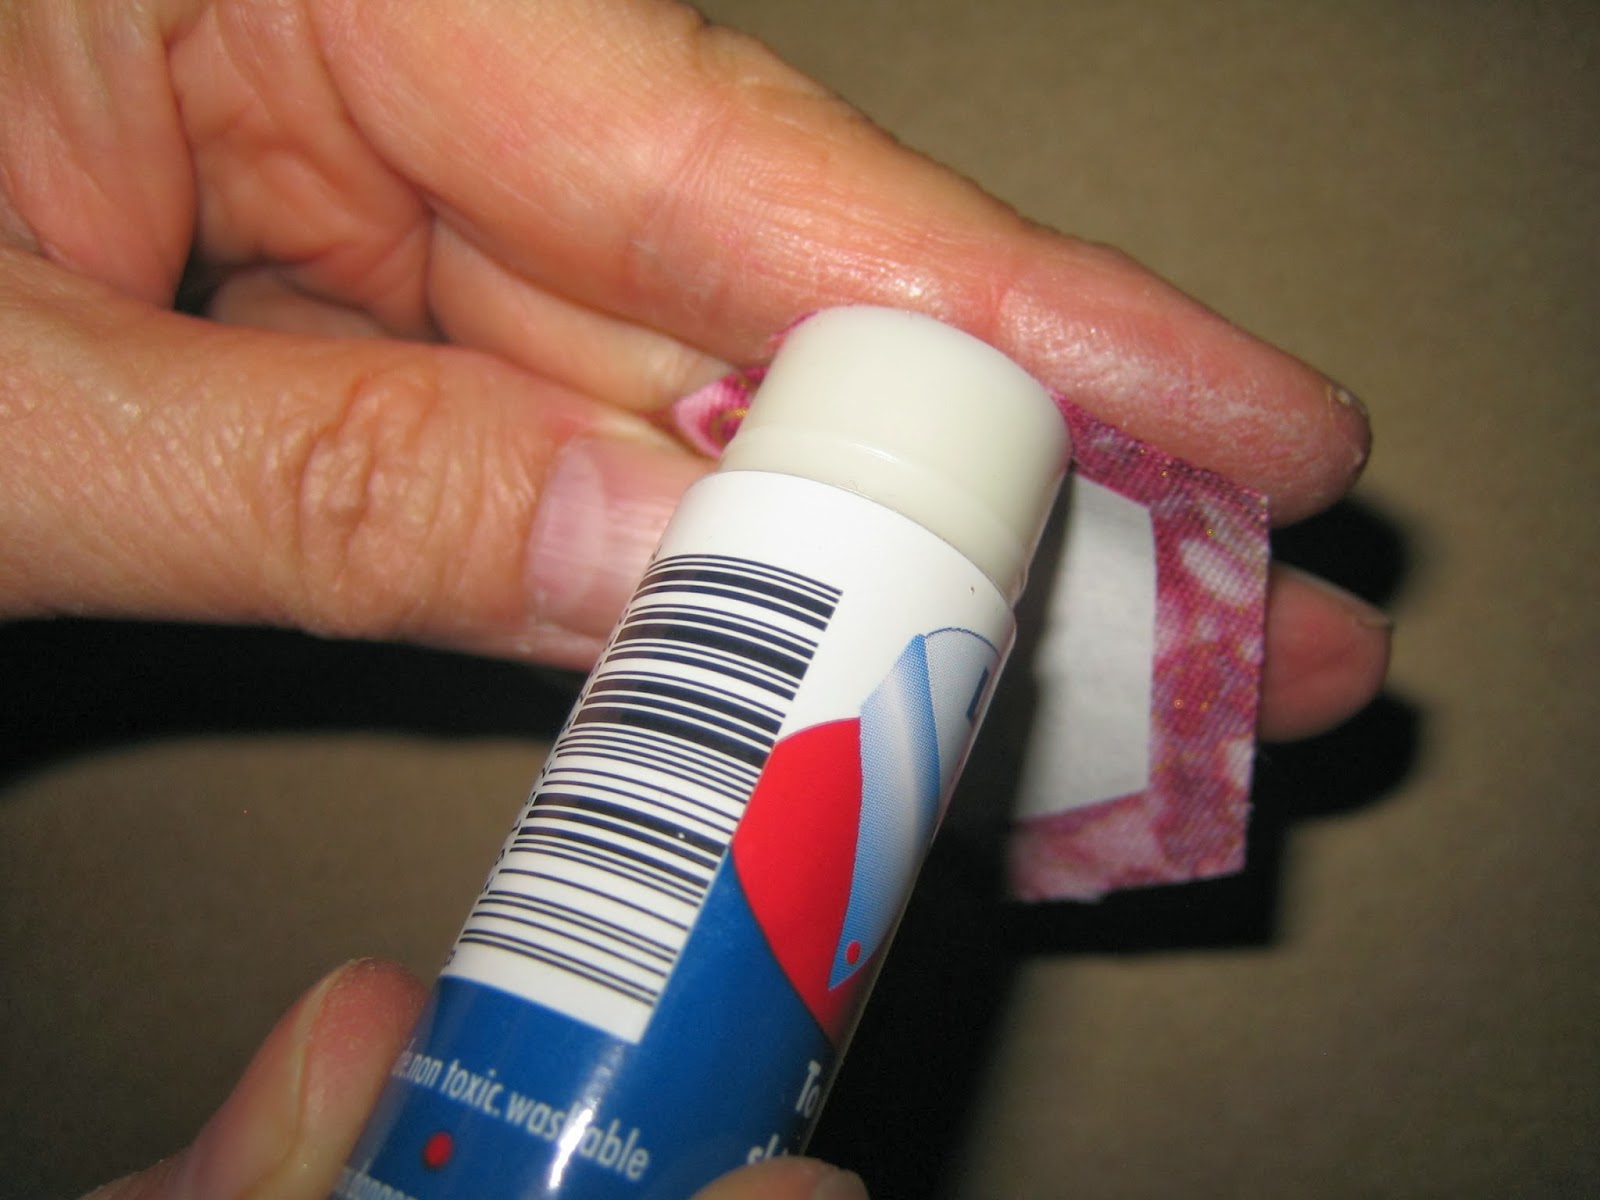
I have tried all types of glue. You name it, I bought it -- but the cheapest is Elmer's stick glue. It washes out very easily and lasts a long time. It is also easy on the budget. It's up to you, but make sure that it is washable as you don't want the residue of the glue to gum up and when it comes to quilting time, or removal time, you don't want the wax paper hexies stuck on there! You can see that I am focusing the glue on the fabric, rather than the paper.

Use your fingers to press down the edges to the paper side of the hexies - remember the wax side has adhered to the wrong side of the fabric.

Make sure you do the corner as well.

You can see the I am getting some glue on my finger as well! No worries! it washes off! I want to make sure that I have the whole edge of that fabric so it will stick where it needs to! I've even glued hexies in the car while travelling through Portugal! This is the easiest step where you really don't need to watch too carefully! I also have a couple of those wet-naps in my kit so I can clean the glue off my fingers!

Closer picture so you can see some edges are narrower than the others  It's ok if they are a bit narrower and a bit wider! It will all work out when you start stitching! You can see the corners are nice and tight. Excuse the lack of manicure! 

This hexie is ready to go!

These were the different glues that I used. The ONLY difference is all three of these are about 3-4 dollars MORE than Elmers. You pick!

Fuzzy pile of hexies!

Voila! After sticking all of them together. Once the whole quilt top is together, then I start picking out the papers.

So my dearest Morgan -- now that you know how to hand-stitch! Guess you know how to put these together! No worries! I am STILL working on this one for you!


Happy Quilting everyone! What are you doing today?

Thursday, June 19, 2014

Flower Wednesday.....er..... Thursday

I seriously do try to make it for Wednesday! These are the flowers I have been working on! Yesterday I came down with a horrid migraine that kept me in bed all day.....so Flower Wednesday is legitimately delayed a day! Now I can go and check out the rest o the flowers! Hope you all have a great gardening week next week!

Tigger the Supervisor, is watching over me as I spend my time sewing some not-so-quilty things! But I have a wonderful excuse...I'm going to be a GREAT AUNT! So exciting for my niece expecting her first wee one! We know it's a girl .. We already have Little Man in the family, so frilly little things are going to be fun! 

We all know that those wee one's spit up -- so I got a bunch of  cloths sewn up for those dribbles and spit ups that wee one's have. Hopefully the new parents will put these to good use when needed! The best would be to wear them out because then I know it was a good idea to sew! I was looking for those gauzy Gerber pre-fold diapers, but nowhere in Calgary were they to be found. I finally found some regular square fleece diapers that I doubled and then turned inside out and added the great fabric. They are thick and soft enough to do the job! I pre-washed the fabrics to make sure that once they go through the wash, they will stay the same size, if not softer and softer every time! |It was so easy to make and the end product looks nice!

I have a cradle that I have kept from Middle Son when he was born. I have loaned it out many times with the rule that anyone that borrowed it must put the child's name on the bottom of the cradle along with the date of their birth. So far, 7 babies have gone through it. I have offered it to my Niece and she said she would love to use it. It's been checked over and the bolts are all up to date. The spindles are fine and not too far apart and will be a great little bed until wee one grows into her crib. I made a new bumper pad that is much brighter than the plain white bumper pads. The white ones are great and just need new ribbons to replace the old one. I'll send that along as well in case she needs to put the bumper pads through a wash. Remember those explosive diapers and the spit ups? ha ha! Well, it always is great to have a "spare"! I made a couple of sheets to go as well, so it will always be fresh for the wee one!

This is one project that I bought double-fold bias tape for. I do not like it! The end result is "done", but certainly not as nice as if I would have attached to the front and sewn to the back. It just goes to show that I really don't like "sewing" the binding all at one time. I really prefer taking the time to sew it on the front by machine and then pulling to the back to hand-sew.It does in a pinch, but if I had to do it all over again, I would take my time. This project is a bit of a rush as we are delivering the cradle tomorrow! Baby is due "any day", so I am sure that once my Niece has it in the house, she will be resting a bit easier knowing that everything is in it's place!

So, all in all, it's been a busy week with sewing! Although not quilting, it certainly has been productive!

Stay tuned as I am approaching my 100th post! I will be hosting a giveaway to my readers for putting up with me and reading along!

Happy Quilting everyone! What have you all been up to?

Margo

Saturday, September 21, 2013

Hexagon madness! Flower Power! (heavy in photo's)

I am always working on one project or another! I vowed that our kids would each get a quilt made by me. One down and four more to go (quilts that is!!) The hexagon quilt is for my youngest. She's a quilter as well but hates, detests, can't stand....hand sewing! Anything that has to do with hand sewing is a vehement "NO THANKS!" ha ha! Good thing that I love hand sewing and I know that she will appreciate all the work that goes into this!
My stack with so many more to make!


This is a freezer paper hexie ironed on to fabric and then trimmed as close to 1/4" as possible (give or take....a bit bigger is a bit better!)

Use a glue stick and paste on one side of the hexie on the fabric (don't worry if you get any on your giner/ washes off/ or the paper as you will be pulling out the papers down the road)
Fold down over the edge of the paper and press firmly down from one end to the other.
make sure that you have the edges down as well as your next step will include folding the next corner down.
This is where you glue the next side to the right of the one you just glued -- or if you are left handed, you will be gluing the side to the left of the one you just glued!
Make sure you press down firmly (ignore my horrible cuticles and nailes.... I am not a girly girl when it comes to my hands!) When you press down firmly, you get nice crisp edges and nice sharp corners!
You can see in this photo that the glue is even on the edge of my finger -- trust me...you want it to be right to the edge of that fabric so that it holds! Remember, this glue will wash out and the papers will come out once all the hexies are sewn!
This is your ready-to-go hexie!
I've used all kinds of glue! My favorite is Sewline -- it's white and has a smaller tip. My next fav is the glue stick, but it's larger and I have to wash my hands more often. My last choice is Fons & Porter -- which is blue and really sticky/goopey to get off -- but works fine on the hexies. Try them and see which one you prefer!
A fuzzy pic of the hexies ready to be sewn!

The hole-punch hexies make for easier removal when you are ready to pull them out. The hexie papers above I was not going to waste!
 If you have questions, please don't hestitate to ask. I can't guarantee an instant response, but if you email me at onlydiamonds@hotmail.com -- it will get you a faster response than just in the comment section (I'm not a great consistent blogger as you can tell!) My hexies are on white freezer paper. I cut them out and iron them onto 2.5" strips of all different cotton fabric that I have collected. I use scraps, purchased jelly rolls and fabric that I've cut myself on the Accuquilt. I have even used charm squares (but find that I cannot consistently get 6 hexies for my flowers, so I tend to just cut enough hexies for my center squares.) Find a hexie size that you like. There are tons of free printables on line, or you can draw a bunch of your own on graph paper and photocopy. When you photocopy -- make sure you copy on the SAME photocopier for all your hexies. Photocopiers vary. I print out my "master" sheets that I will use to cut my freezer paper out on. I then fold my freezer paper to match the size of the photocopied paper. I then staple in the center of EACH hexie. I cut (with paper scissors, each pile of hexies. I find that each stapled bunch that I can manage easily is the master top sheet plus 4 layers of freezer paper. Once all the hexies are cut out -- I hole punch each bunch and then remove the staple from each bunch, tossing the top hexie out (some die-hards will put a dot of glue on the center and put it on fabric -- I'm too lazy and just want to place the wax side down of the freezer paper hexies and iron them on! When sewing together, use s small whipstitch. Some people use the same colored thread to match the flowers they are sewing. I use a neutral color and find that my stitches are small enough that you don't notice the thread. Of course you are going to use what you are comfortable with. Some people want to use only cotton, some people will use a polyester. Again, it is your choice. If your quilts are going to be inspected by the quilt police, you already know what the expectations are! ;-) As for needles -- my absolute favorite are Clover Black Gold Needles specifically for applique/sharps (no.12). They are specially polished with Black plating. These needles pierce through fabric "effortlessly"! I totally am hooked on these! Considering that you have glue AND fabric to go thorugh -- they just glide right through! When you can sew without any hitches, you can work on getting those nice tiny whipstiches! If you have to pay a little extra, it is worth it! If you would like to see how I prep my hexagon's before I get them to fabric, let me know! Happy stitching everyone!