Showing posts with label sewing room. Show all posts

Friday, December 30, 2016

Sneak Peek - Black Birds Quilt

Well I have a few WIPs (work in progress) on the go. Two are in the final stages (Quilting & Binding) so as a kudos for near completion I started a new project! Not entirely sure if that logic makes sense... but it does to me

As you know I love the quilt designs of Lorna with Sew Fresh Quilts. I just recently finished her Dog Gone Cute quilt and was eager to start her Black Birds pattern. I am way to excited to wait until I have more completed on this quilt, I just had to share.

https://www.etsy.com/ca/shop/SewFreshQuilts

I finally made my way into the city to pick out the fabric for the Black Birds quilt. I was visiting my grandmother who just so happens to live one block away from my favorite quilt shop. You know what they say "When in Rome" ... you buy fabric ha-ha.

With out further adieu here is a sneak peek of my new project. I hope you are as excited about it as I am!!!

I felt like a princess at the fabric store. I had my own personal fabric specialist help me pick out my colours for the quilt. The entire store was mine, it was a great day of retail therapy.


I have all my fabric cut and ready to go! Instructions to the left and fabric to the right (what can go wrong). I honestly have to say the cutting for this project really was a breeze. I did it on Christmas Day while my Hubby and Brother relaxed by the fire drinking hot chocolate.


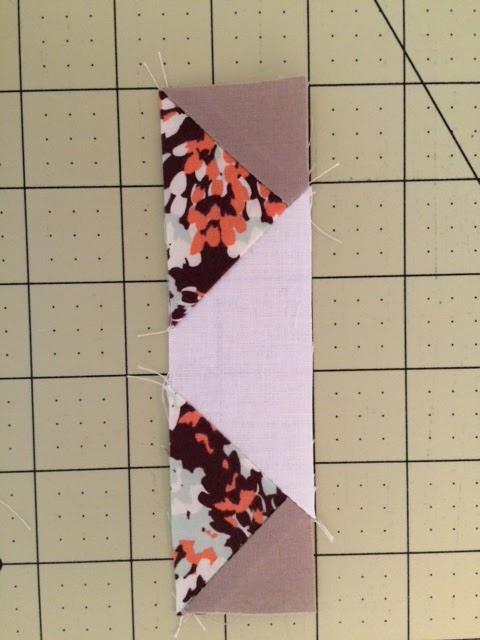
Don't look too close this was the very first birdy I made, they have gotten progressively better the more I make.


Seeing that I am so eager to share my new project with everyone I have linked up this post to the Fort Worth Fabric Studio and Busy Hands Quilts link party. It's always nice to find gracious link up party hosts.

Have a look at the Link ups, there are some fantastic projects there to spark your inspiration.

Until Next Time
-The Youngest-

Tuesday, November 24, 2015

Dog Gone CUTE


I was browsing through some quilt blogs when I came across a Blog Hop by Sew Fresh Quilts. I was instantly enamoured with the Dog Gone Cute quilt. Without a second thought I knew I had to try my hand at this quilt.

Now a blog hop is a big commitment and I did not want to be tied down to any time lines. So instead of signing up for the HOP I purchased the pattern from Sew Fresh and decided to work at my own pace.


I found some fat quarters from an online Canadian fabric store Fridays Off specifically for this quilt. The customer service of Fridays Off was excellent and there are some really great fabric options on there, for a reasonable price.I find it hard to find online fabric shops that will ship to Canada without it costing me an arm and a leg.

Fridays Off offers $5.95 shipping anywhere in canada and orders over $125 ship free !!! That sold me right there. Oh and to top it off when I got my package in the mail there was a darling hard written note. Way to make a customer Happy! Way to go Fridays Off !!! Happy Customer right here

Before I started the Dog Gone Cute quilt I had one more baby quilt I needed to finish as there was a dead line ... the baby was about to arrive! You can see that quilt in the "Winner of a Quilt" blog post which was posted earlier this month.

Check out my fabric choices below - can't wait for it to all come together.


 _________________________________________________________________________________
 
Like any other sew day I called my Mom up last minute and invited myself over. The deal was that if we are doing a sew day I needed to do her hair first. She got new rollers and wanted to test them out. I begrudgingly agreed ... I say begrudgingly only because if you have tried to put rollers in your hair with those darn pins it is a big pain in the B . U . T . T!

Alright lesson learned my Moms rollers are high tech and WAY better than the older style ones. They heat up fast, easy to put in and make amazing curls.

PS. FAMILY - I would like to add these rollers to my Christmas List ☺☺


With the hair done we now started on cutting all the fabric for the Dog Gone Cute Quilt. We worked out a system where Mom read the instructions and I cut the fabric.

The hardest thing I find when cutting fabric from a pattern is I always end up going back and forth from the pattern to the fabric. The whole "Measure Twice, Cut Once" idea. Well I second guess myself and end up measuring for about 5 minutes per cut. Having a reader and a cutter makes the whole cutting process go by a heck of a lot faster.


In one afternoon we managed to get all the background, ears and nose fabric cut + one patterned fabric for one dog. In the below picture you can see the first dog we selected to do.

We used the highlight as you go method. As we cut we highlight so we do not end up duplicating cuts that have already been made. This seems to work well for me.

In the initial layout of the pup (below) he looks more like a gremlin instead of a Cute Dog ha-ha.


This quilt is a work in progress. I am taking my time, trying to match up those points the best I can. As usual my seam ripper has become one of my best friends. My BF knows I have made a mistake when he hears the machine abruptly stop followed by several grumbling sounds.


Pup One- When I saw the final block I was like a kid hearing an ice cream truck in summer


Pup Two - One of my favorite fabrics from my Fridays Off purchase


Pup Three - This is the BFs colour choice


 Pup Four - For some reason I found this one the trickiest so far (I may have been tired at this point)


This one is so cute I am going to keep it for myself.
Stay tuned for the completed quilt!
If you would like to see other projects from some fellow bloggers check them out HERE .
And don't forget to leave us a comment !!! We love hearing from you


Wednesday, July 1, 2015

The Youngests - Edition # 3

HOWDY Y'ALL

Well I’m back and all tanned and rested up from our vacation in Palm Springs, California. Two girlfriends and my patient BF went to a 3 day Country music festival “Stagecoach”, it was a blast.


I’m now re-energized and ready to tackle this Hungarian sewing desk. ….. Where did I leave off? Oh right we were all primed and ready!

Now comes the finicky part, the Painting. I have been dreading this part and that may be why we did a whole vacation before we attempted to tackle the painting of the desk. I have been doing everything I could think of besides doing the painting. I even opted one day to clean the washrooms over painting the desk =S
Now it’s down to the final hour and I have to get this desk done. We were living in a bit of chaos with the garage and front room in shambles. I have a somewhat fuzzy idea in my head of what I want this room to look like. The BF and I decided the best plan of attack is to get the cabinetry and then match the paint colour for the desk off of that.
 HI HO HI HO it’s off to IKEA we go – we head into the big city to pick up the cabinetry from IKEA


We all know that putting together IKEA furniture can be like pulling teeth and have caused many divorces hahaha. With that said I am rather impressed with the BF and I. I only had to leave once because I was getting Hangry. Hangry - it means to be angry as a result of being hungry. SO I promptly left the front room whipped up a quick dinner of lemon butter shrimp and rice for the BF and I, problem solved.

After a couple hours, dinner and a visit from our neighbor and their beautiful little girl we finished!Next stop is the paint store but we will leave that for another day. Oh and how could I forget that I need to start filling those shelves with stash =D

Saturday, June 27, 2015

The Youngest's Edition - #2

I have a vision for my sewing room, with the help of Pinterest. https://www.pinterest.com/morgan_vb/
I’m going for a bright room with a pop of colour that is simple and uncluttered. YEAH right, uncluttered… in a sewing room! Well I figure that’s what I’m going to aim for, might as well aim high if I’m going to aim at all.
Step 1 – Sell all of the current furniture (THANK YOU KIJIJI)
Step 2 – Well I wasn’t sure what step 2 was until my mom emailed me a picture of a desk
Step 2 – Okay step 2, buy desk and refinish … and convince BF to help

And so starts the adventure of the Hungarian sewing desk!

My mother had the find of a century. She found the desk I had envisioned in my head on KIJIJI (THANK YOU KIJIJI). All I had to do was sand it down and paint it white … sounds easy right HA that’s what I thought. My mom went to look at the desk for me as I was stuck up NORTH at work. Turns out that the gentleman “Louie” who was selling the desk ended up coming over to Canada from Hungary on the same boat as my mother’s parents and older sister. What a small world! The desk Louie was selling belonged to his late wife who was an exceptional sewer and painter.
Looking at the desk sweet Louie reminisced about his wife sewing their children’s clothes and costumes. As my mom listened to his stories she knew this was meant to be. My mom reassured Louie that this desk will remain loved and cherished in a Hungarian home. Now comes the fun part… the refinishing. As I have never done this before I took to the internet and with the advice from my new best friends GOOGLE and BOB VILLA the refinishing didn’t seem so daunting.
Good ole Bob instructed me to use my handy dandy multipurpose sander to sand the entire surface of the desk. Only problem I definitely do not own power tools, and this seemed to be the one power tool my BF did not have. Well have no fear da da da RONAs here! As fast as The Flash we went to our local hardware store RONA and purchased a very shiny and new power sander.

I was at the ready with the power sander in hand. I had a good go at the desk and got most of the clear coat off. My BF jumped in and finished all the fine tuning, he did an excellent job. With each pass of the sander we could see the desk transforming and coming to life again.


Again thank you BOB VILLA for the next helpful tip: Use a good spray paint primer as suggested by Bob we used white Painters Touch Spray Paint Primer.


Now all primed and ready for the first coat of paint my BF and I packed up and called it a day. We had one more week of work and then we were off to Palm Springs California to see my good friend and enjoy some Country music, sun and pool time; a well-deserved vacation.

Until we meet again,
The Youngest

Monday, May 19, 2014

Sewing Room Re-vamp!

My absence has been warranted...this time! I found a great deal on Kijiji for furniture and bought it for myself for Mother's Day! It's all handmade with tongue and grove drawers and once I had it in my room, I swear it was made for it!

I've been searching for new furniture to organize all the stuff that I have, but then again the room I have didn't grow! Limited by my budget, I am really happy with what I found and it has tons of space to organize! I can configure it the way I want to suit my purpose! I love it! Take a look!

When you stand in the doorway this is what you see


in the corner is where my TV sits. To the right is the stand that holds my Accuquilt and a few boxes of kits and miscellaneous fabric. The TV stand holds my ribbons and ric rac, along with the bottom basket is toys for the little man when he comes to visit.

The stand with my iron is still in progress. Chef is going to raise it to the same level as the TV stand and the cupboards below the window. The little cupboards that Tigger is sitting on, hold various craft supplies. the drawers below are for embroidery, hoops and of course a cupboard for the Little Man for his craft supplies.

To the left of Tigger is another drawer for fabrics. Rather than take off the legs, I wanted a space for my extra cutting boards and of course a couple of boxes with projects in the works. Below the drawer set are four deep cupboards that hold all my plastic containers with my fabric. All my pre-cuts are there (i.e. charm squares, jelly rolls etc.)

This next cupboard is to the left of the window. It can be either on legs, or as I have it. I put all my filling and batting in it. It's strong enough for us to sit on, or recently the Little man tucked his blanket and pillow on it to watch TV. I wanted it low enough that I am able to still use my design wall.

Next to the batting box was my previous drawer on wheels. It holds all my machine parts, thread and of course bobbins. The jelly cupboard to the left of that (with the black book on it) holds the rest of my thread. The bookcase is basically the same with my fat quarters. To the left is another corner bookcase that came with the furniture. It holds odds and ends right now and things I want closer to me.

Looking to the door, is my sewing machine and of course my cutting table. My extension table butts up to my cutting table, so if I am sewing a large quilt, I have the table to support it. I have two filing cabinets under the cutting table that I am still thinking about relocating, or repurposing. For now, they are staying where they are. Of course my handy retreat tote is close in case I want to pull something out of it. 
The view from my seat. Tigger in his glory being able to sleep and look out at the window when he wants (I'll have to sew a cover that matches the rest of the room). My TV is fabulous as the Blue Ray that is hooked up to it lets me watch You Tube as well as Netflix. It's a great set up and I love it! Now I have room for more stash (heaven forbid!) I'm working towards more creativity and using up the stash that I have! So far, I've been doing a lot of browsing and less sewing!

Next weekend is Heritage Park Quilt Festival! The projects are set and ready to go. More on that after next weekend! I get to drop them off tomorrow! Meantime this week is slated for finishing up long due baby quilts! My hand is feeling much better! I have arthritis in my thumb joint (MCL) and I went for an x-ray guided injection a few weeks ago. It is feeling much better now! Typing for most of my life for a job isn't something that great for it, nor is my quilting -- but it's something I never want to give up -- typing AND quilting! 

Happy Quilting Everyone! What do you have in your sewing room that works for you?


Saturday, March 1, 2014

How much color to your creative space?

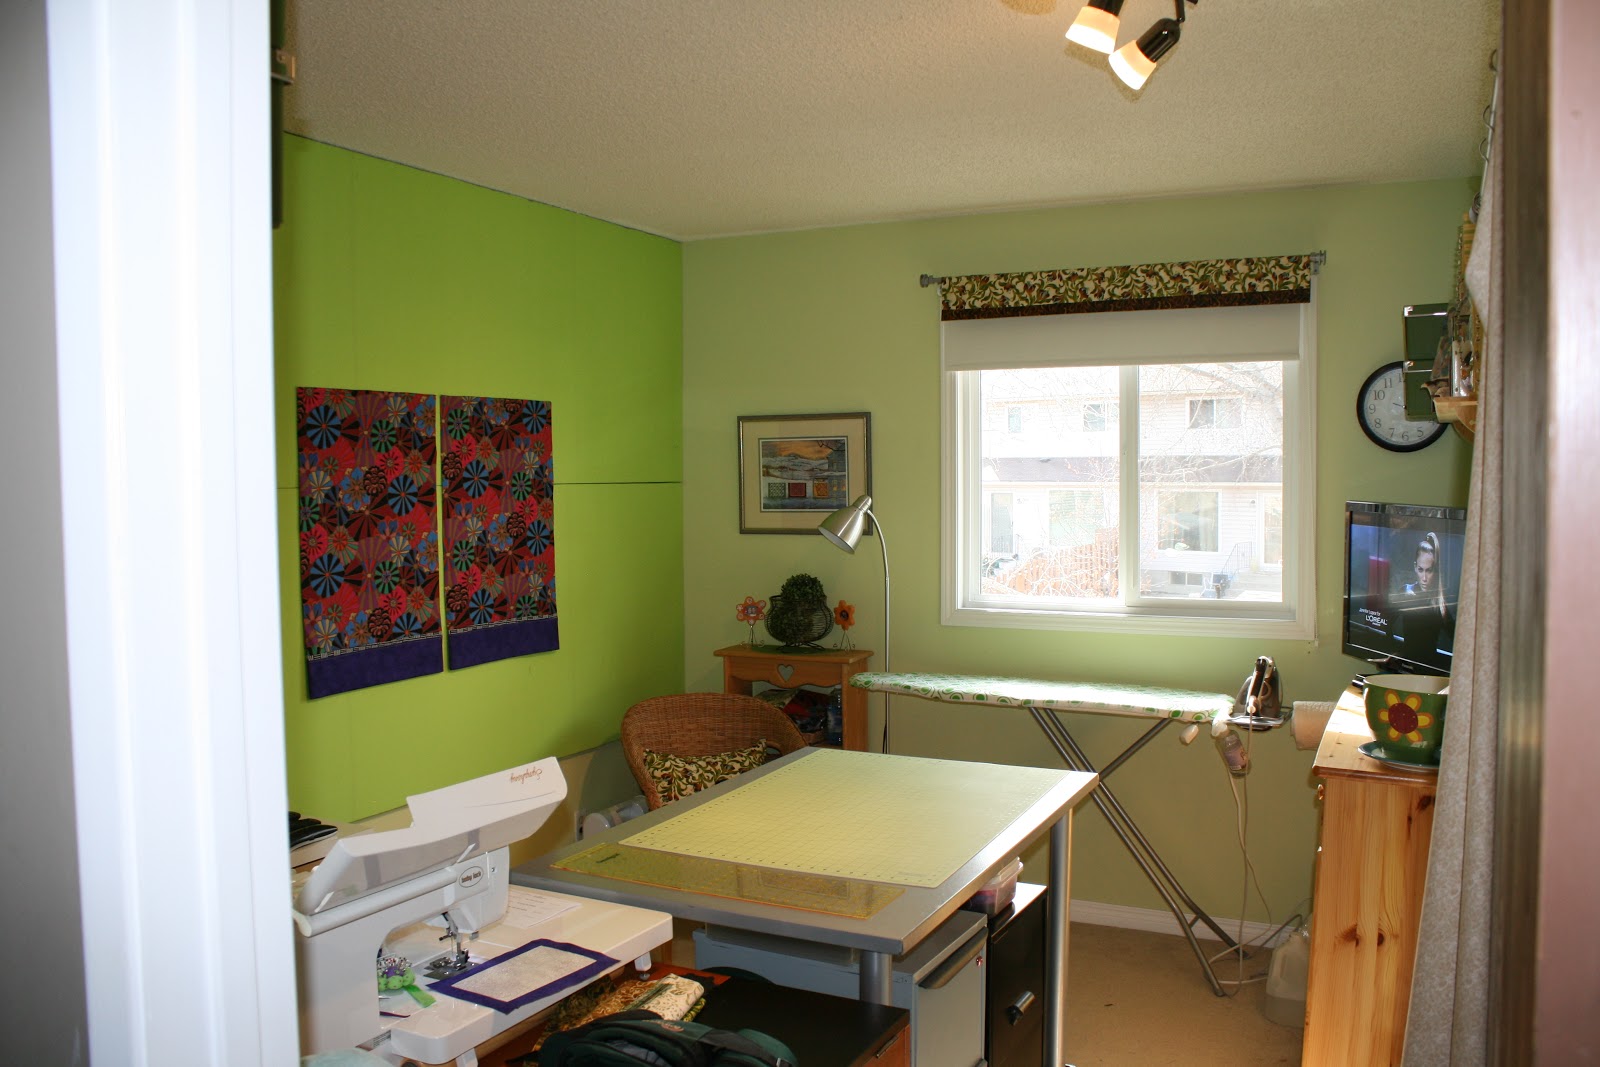
My tastes are very low key and very "matchey-matchey", as my youngest would say. I play it safe with my colors at home. Taupe colored walls, brown leather club chairs in my living room with the beige carpet and wood coffee tables, etc. You get the picture! Even the pillows are very "blah". I have been dreaming of color, but not confidently when it comes to decorating my home. I read all those design magazines and blogs. I droll over the photo's and just shy away from wild colors in my living spaces -- EXCEPT for my sewing room! I love the apple green, but I decided it needed a pop more of color and I added red.
 
OK...so maybe it's not all red! But at least it gives me choices! A very simple header. Here is how lazy I am -- you get your yardage, fold it in half, press neatly -- then press pleats in and put up on your rod with those great curtain clips. I am so challenged when it comes to cutting fabric that I love! This way, if I want to change this fabric header, I can and perhaps use the fabric for something else!  I know there will be those of you who will tell me that the light will bleach the fabric (I have a blind underneath so the sunlight doesn't go directly on the fabric). Also, I have a number of places that the fabric can be used... potholders, small stuffies, my grandson's practice sewing...etc. Maybe a lining for a bag? Who knows. I had enough where I used the same fabric to cover my ironing board.


I have a shelf above the television. For now it holds a few boxes of items that are used rarely, but I don't have the heart to throw them out! IKEA here we come and I added some red boxes as well. I have green boxes scattered throughout. The little birdhouse with drawers was an ugly, baby-poo (haha) yellow -- so I painted it out to match! Love it! Some of my favorite photo's that will have to find a new home when I run out of shelf space! My sheep from Portugal that I intended to use as pincushions (but didn't have the heart to) and a place to put my Best Press refills, close to the ironing board.

There are empty wall spaces that "could" hold some mini-quilts, but that would mean another project -- for which I am holding back on now until I get control of the WIP's (works in progress!) \UFO's (un-finnished objects) sounds a little too negative to me! WIP's sounds like I'm going to "crack the whip", "whip something up!" "whip it together!" -- nicer don't you think?

I am always re-thinking the space and wondering what else I can do. The green on the walls are much brighter in person than how it shows on the photo's. Regardless -- it's my happy, bright place!

What are your sewing room favorites where you create?

Happy decorating all! Maybe I'll have courage to tackle the rest of the house come the spring. Or at least some wild pillows in the living room!

Margo


Friday, March 29, 2013

Sewing Room, Organization, making "do" with what you have!

I always enjoy browsing through people's sewing rooms. I like to see how they have things set up and things that they use. So, with that, here's a tour of my little room! I'm not an expert by any means, but it's mine! Something I never had! I had many years of clearing the dining room table so that we could eat! The youngest moved out and I took over! Chef painted it a great green apple for me. The  contents are are things that I have collected on the way and re-purposed the best I can. I am grateful for my little "space". I hope you enjoy the tour and get some ideas that inspire you! Come on in!

I am limited in space, but I was left a dresser by the youngest. I've stashed craft supplies in it and it holds the tv that Chef bought me for the room. Beside the dresser and the window wall, I stash batting, pillow forms and the like.

Above the dresser I have shelving for storage of memento's and a few storage boxes for fabric bits and pieces. The birdhouse on the far right was a garage sale find with three little drawers. It's not in use, but hopefully one day I'll find a spot for it. Family photo's and my favorite items are on this shelf. The little sheep I brought back from Portugal, a few decorative thimbles. All dust collectors I assure you! My next cheap investment is one of those small photo rails (made of wood) from Ikea. It will go underneath the shelf just above the tv. The small little items can be placed on it, giving me more room to get some more storage boxes. The boxes here are from Ikea as well. Cheap and stores fabric safely away from the sun!

On the wall directly as you enter my room is full of gadgets. The boxes on the shelf above are fairly large and hold a multitude of fabric as well as specific projects on the go. The little ribbon that I have is stored on one of the rails. The small mason jar lids were screwed to the bottom of the shelf by Chef and the jars hold buttons according to color. I don't use them a lot, so I really don't have a large collection of buttons. You will notice to the right of shelf are two cans. These are compressed air cans that I use to blow out my machine when I clean. I keep them high so little fingers can't get into them, but evident enough where I know where they are.
Here is a shot of the corner when you enter:
The table that my sewing machine fits on is a computer desk that I found at Liquidation World for $30. It has heavy cast legs. The top has two flip up drawers that I can stuff things in.
When the tops are down, it still gives me a great deal of surface space to work with.
The backside (side facing the machine) has three drawers that I put the little tools that I use. Now with the cords from the machine and the lamp, I do have to move cords when I need to get into the drawers (no big deal). I also have a knee lift on my machine that I have to remove if I want in the middle drawer (again, I store stuff in there that is not used on a regular basis. On the floor I have one of those chair mats for offices. It lets me move my chair easily when I have to get up as well as protects the carpet from moving around. Command strips are my friend and I have one on the Ikea table beside my sewing table to hold my little scrap bucket. I store my extra "class" suitcase underneath that I can take to classes. Every inch of this room is used as you can see. Sometimes I think it's cluttered, but I have everything in a spot that I can easily access.


My eldest made the great pottery holder. It was for kitchen utensils, but I found it was great for scissors! You'll note that I have fabric strips on some of the scissors -- those are for FABRIC only. I think everyone in my house learned that in a hurry! I've seen some bloggers put a lock on the handles. My kids complained that they didn't know which ones were for fabric and which ones were for paper. Solved that don't you think?


 Right behind the chair is one of my cupboards that holds thread. Maybe they call it a Jam cupboard? I found this little cupboard along with the other one behind the wicker chair for $20. Works for me! The little corner is where I store my Accuquilt Go and templates, and the shelf holds scrap fabric waiting to be cut into precuts.
The goose neck floor lamp gives me task lighting if I am stitching by hand or I can move it to focus on the design wall when natural lighting is low.
The photo above is just an example of using things that you already have around the house. The larger jar keeps my little odd pieces of fabric that I am saving for a special project. The black rack is a telephone rack for an office. The side compartment keeps my smaller catalogues, underneath holds larger catalogues and graph paper. Those great Crystal Lite containers to the top left side holds glues, and pens and markers.

The bookshelf beside it is "Billy" from Ikea. It holds magazines, quilting books, work books and of course fat quarters! The brass container on top is my mom's old ice bucket from overseas. It holds my binder clips for when I pin layers. Command hooks on the side of the bookcase hold the rotary cutters out of harms way from the little one.

My fat quarters I've tried to sort into colors. I'm learning and I am not an expert by any means. To give you an idea, I use my smaller 6" wide ruler as a guide for folding them. Take a look at your stash before you plan on heading out to browse. That way you will know what colors you are short of. I have plenty to keep me busy!


Can you see that I love Ikea? The drawer unit to the right of the bookshelf came from Ikea. It was in the "As Is" section for $25. It had a top drawer that was stuck and not sliding properly so anyone who tried it walked by it. I rolled that little thing to the customer service desk and asked if someone could take a look at the drawer. The guy looked at it and said "No problem!" and fixed it within seconds! It holds my thread specific to quilting as well as all the feet and accessories for my Baby Lock! The basket on the floor beside it is another garage sale find for $2. It holds odd pieces of ribbon, lace and my zippers.

The little green basket was $1 from the Dollar Store. It holds the rulers that do not have a hole to hang on the side of my cupboard. Works great and easy enough to turn from the cutting table to grab quickly. I thought about buying one of those ruler holders ($50???? are you kidding???? My $1 works just fine and gives me extra room for the remotes and cordless phone!)


The bed risers were $4 for a set of 4. They lift that Ikea table enough where it matches the extension table to the Baby Lock perfectly! The best part of this is two file cabinets fit perfectly under. (I'm on the search for another one to match either of these so the heights are uniform). The trolley holds my extra Baby Lock for classes. As the closet and file cabinets act as our "office" it's easy to access the file cabinets under the table.There is a bit of room on top of the cabinets where I store my precuts in plastic bins. Keeps them out of the way, but again, handy enough to grab when I need to.

Let's take a look at my small collection of books and magazines. I've made the decision that I am not going to buy any more magazines. I find that I hold on to them, read them once or twice and then on the bookshelf they go. I haven't taken  patterns from them, but I'm still holding on to them because I spent money on them! Storing them are a pain, but I used labels on file folders to sort somewhat. I've decided my days of buying quilt magazines is over. Blogs are great! The internet is great! Mind you, books are another thing! I do have some that I would never give up that I refer to all the time. The one on the top is Fon's and Porter's, Quilter's Complete Guide. It was the first "quilting" book that I bought that I continue to refer to. Pick and choose your books carefully. Check them out from the library first and if you keep checking it out, then invest in it. I found that magazines can also be checked out. If you find one that you absolutely LOVE, and plan on making something with a pattern from one -- then by all means buy it! Oh, did I mention that the library also sells some out of date books (aka QUILTING books!)  Remember that the money you save from not investing in these items can go towards more STASH!

I've set up my machine so my back isn't towards the door. I am focused when I am sewing and want to know when someone is coming in. I am limited with space, so I wanted to set it up so I could glance outside at the weather, but then watch the tv without craning my neck around. My ironing board is set up against the window because it forces me to get up and walk over there. I get to look out and see the world, besides taking a break from sitting. Movement is good! Having a pressing station next to your sewing machine causes you to twist your body in your chair. Although handy for sewing, repetitive motion like this is not great for your body! Take it from my physiotherapist who gave me some pointers on sitting and movement during a sewing marathon!


 There are a number of things that you need to consider when you are setting up your studio/sewing room:

1. Lighting - natural light is great, but if you put your sewing table in front of the window, you may be blinded by the sun streaming through at certain times of the day. Realize the elements as well. You can either roast like a tomato in a greenhouse or have things blowing around on your sewing table. The lighting in the room needs to be adjustable, depending on where you are setting up your cutting table and sewing area. Spend the extra dollars when you buy bulbs. A good daylight bulb may be more expensive, but it doesn't change colors on your fabrics. We bought the figure below for $15 from Home Depot. I have one of the bulbs aimed at the design wall, one on the cutting table and one over the sewing machine.


2. Furniture: Check Kijiji, Craig's list, garage sales. Someones junk can surely be your treasure. Think big picture. A dining room table set up on bed risers is a perfect cutting table (especially when you can do this for under $20!) The sewing table can be a computer desk or a kids desk. Try and think outside of the box, especially when you have to work with a budget. Don't be in a hurry. Be patient and wait for the deals. Meantime, make do with what you have. I got my adjustable chair from an office sale. It was $10! Totally adjustable for the perfect sewing height can be achieved. Don't discount dressers. You can always repaint and then make the top into your pressing station. a staple gun and paint can go a long ways in refurbishing items. Sometimes I think so many people get stuck on "matchy" items that they spend way too much money! Make it work for you.

3. Fabric Storage: Decide what's important. Do you need fabric stashed for a long time? What can work for fabric stash? (boxes? plastic bins? bookcases? dressers?) Think about how "fast" you want to access it. Bins are great, but trust me on this, you don't want to have to lift bins off of each other to get a small scrap and then have to haul everything back into place. My large pieces (i.e. flannel, fleece) are in plastic bins in the closet. They are not something that I use daily, so they are stored in the large bins. Small precuts are in small plastic shoe-size containers. Enough so that when I have enough of the scraps in there precut, I'll just sew a top and then start over again.

4. Thread storage: Now I always wanted one of those racks that go on the wall. I bought one and before you knew it, the spools were all dusty. I then had smaller racks that you could put into a drawer. It worked great for a while, but then my thread collection grew. My little storage cupboard works great, as well as drawers. I don't think there will ever be a "perfect" thread rack, but again, use what you can. I've seen people use clear cookie jars that show off all the colors. Find something that is handy to your sewing machine! Bobbins have been a pain. I've tried every type of bobbin holder, from sticks in my spool and the bobbin attached on the top. Now I am using a circular bobbin holder. If you have room, you can always arrange them on plate racks with a golf tee on the top holding your bobbin to the spool. This one is still a challenge for me, but at least my thread and bobbins are close to my machine. That's all that really counts for me!

5. Furniture placement: Be aware of where you want your back facing. If you have a view, it's great to look up now and again. You also want everything in reach that you use on a regular basis. Do you want to get up every time you need to cut something? How many sides of your cutting table do you want to access? Rather than putting your table in a corner, where you can only access from the front and side, maybe placing it in the middle of the room will let you walk all around it. Perhaps you want to put the cutting table beside or behind your sewing area so you have support when sewing larger items? Consider the weight of your furniture as well. Remember, you don't want to be moving grandma's old 200 pound table around on a regular basis! Can you put a dresser in front of your sewing table to give more room for sewing as well as provide you with much needed storage? For me, my light Ikea table can be moved off the risers so that a friend can sew with me as well. The one great thing about my little room is I can slide the Ikea table into the area between my sewing machine and bookshelf and thread cupboard. I can then move the file cabinets underneath it. It gives me enough space where we can inflate a queen size bed for an extra guest or two when the guest room is also being used. It works and all my "stuff" is still safe! When our house is loaded with guests, I'm not going to have time to sew!

My "studio" is a work in progress. I find things, I get rid of things, I change things. Do what works for you! Re-purpose and re-use whatever you can! Afford what you can buy when it comes to the tools of your trade. Buy good fabric, buy good thread. Spend money on a good rotary cutter and rulers that will be used over and over again. If you find good boxes that you can cover with scrap paper (or color code), do it! It's cheap and it works! I found an old cutlery tray that works perfect in one of my sewing machine drawers! If you have any more great idea's to suggest -- comment! You never know who will find your tip to be the greatest!

Happy organizing!