Showing posts with label homemade. Show all posts

Saturday, April 16, 2016

East Coast Quilt - WIP

Here is a project I have had hidden in my drawer for sometime. I think it goes back to 2011- 2012.
 
I have quite a few friends from the east coast and they always had these amazing quilts with hand drawn pictures of things that reminded them of home. I have always admired the hard work and thought it took to draw out all the pictures. Being one who likes a challenge I thought I would try my hand at creating one of these East Coast Quilts.
 
Sadly I was not blessed with the ability to draw, the extent of my drawing skills is limited to stick men. I cannot take credit for the designs below. I found east coast inspired pictures online and used them as my template for the blocks. I taped the outline of the pictures to the window and placed my blank block over top. I then traced the picture with a fine pencil and coloured it in as saw fit with crayons.
 
To set the newly coloured block I placed a scarp piece on fabric over top the block and heat set the crayon design with the iron. The excess wax from the crayons transferred to the scarp piece of fabric and I was left with a nicely set picture block.
 
Below are some of the blocks I have done to date. I think they look half decent! When they are all sewn together with a nice tartan fabric in between I think it look great.
 
The quilt will be comprised of (12) 12" x 12" blocks - (3) across (4) down with tartan fabric for the sashing and borders.
 
I have (9) blocks down and only 3 more to go. So close to the finish line ... with that said it may take a couple more years ha-ha.


Until next time
-The Youngest -
 
Don't forget to leave a comment!

Saturday, March 5, 2016

Presents Given and Received

Today's Blog post is dedicated to Gifted Quilts

Quilt # 1 - Mom's Creation  

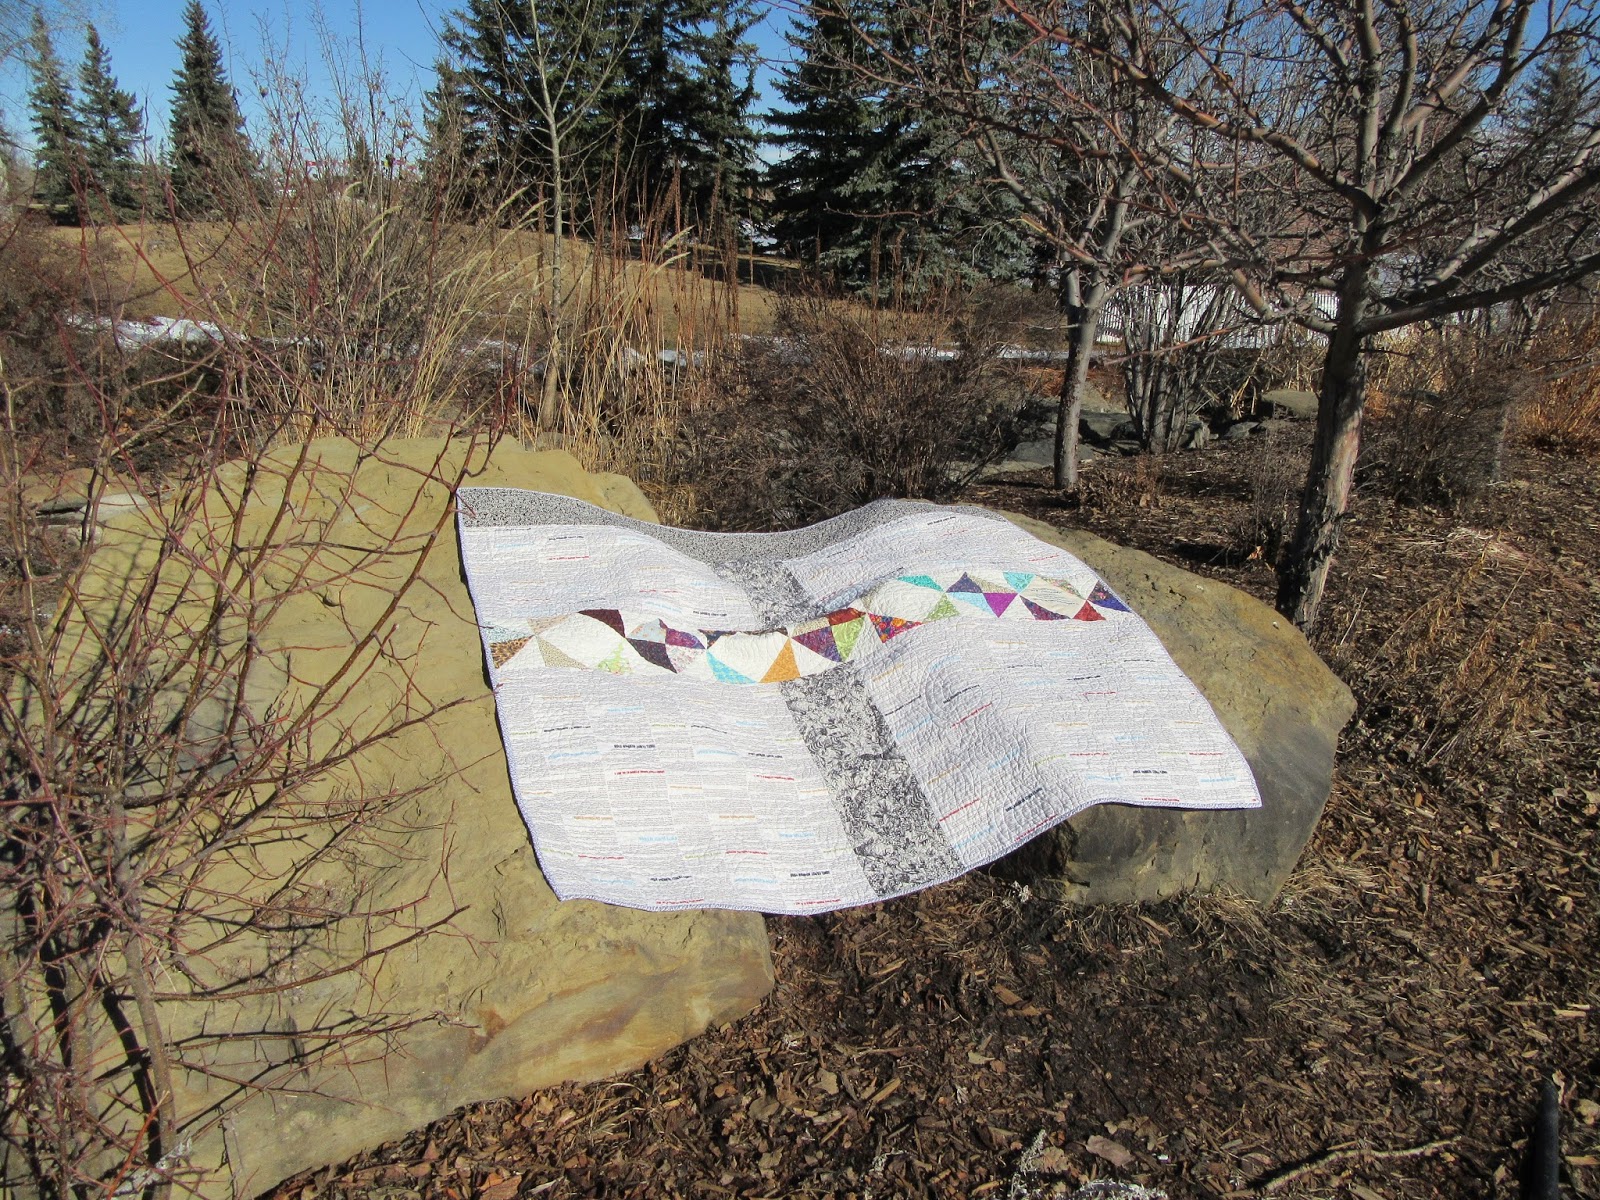
 1st up is my Mom's quilt. This quilt has been a labour of love for her. More labour than love ha-ha. I say more labour as it took her over a year to complete as a result of her hand surgery. This Scrappy half square triangle quilt is for my moms best friend the retired judge. This year she is celebrating her 70th BirthdayA big driver for my mom to have this quilt completed.

Lucky for my Mom she had the top ready to go before her surgery. All that was left to do was the machine quilting and binding. I shouldn't say "all that was left" because the end sometimes is the hardest and most tedious part. She is more adventurous than me and usually machine quilts the top herself however in lieu of her hand not doing so well I dropped it off to be quilted for her.

Once she got it back from being machine quilted it took her over a week to do the binding, little bits at a time. Usually she can have the binding done in no time .... I know this because I used to always pawn off my quilts on her to bind (still not my favorite part). The funniest part is that even with my mom basically using one hand to do the binding it still looks professional and with invisible stitches. HA mine look more like a kids 1st sewing project.

HOPEFULLY next up for Mom is a Wedding Quilt for her FAVORITE DAUGHTER
(PS. I can write favorite daughter cause I am writing this blog post =P )

Below is my moms Scrappy Half Triangle Quilt Enjoy!  


 What a great pattern, has such dimension. Almost looks 3D.


This back brings a modern twist, very versatile. Would look great on a bed with the back being displayed.


A hot new trend is the word print fabric ... I am jumping on the train for that trend. I can not get enough of the word/script/newsprint fabric. I am always drawn to it in the fabric stores.


The first look when she opened her gift
She looks thrilled! 
Mom says sorry it's so blurry!

Mom's best friend and then Mom - they both look pretty happy!
 I think she likes it!

****
Quilt # 2- The Youngests Creation 
2nd is my latest quilt. This quilt started out as a kit my Mom bought me about 5-6 years ago. I have been slowly picking away at it. I started putting it together 2 years ago at one of the quilting retreats.

With this quilt I had to use You Tube a little as the instructions that came with the quilt were basically in another language. This was the first time I have ever attempted a Y seam. My mom "seams" (ha-ha sewing joke) to think that me doing Y seams is impressive. Honestly I did not find them very difficult, I had a couple seam ripper moments but that is normal in any project. You Tube really was a big help.

This pattern made small windmills however I decided not to match up the fabric to form noticeable windmills. The reasoning was that I did not like the look of the defined windmills. When it was all laid out the windmills ended up very asymmetrical and not evenly distributed. I just felt that it would look better more evenly distributed. If you look close you can still make out Red and Black windmills. They are still there just less defined. All in all I like how this quilt turned out.


Since this blog post is all about "gifted" quilts I should probably tell you where this quilts new home is. I decided since my Mom was so impressed with my Y seams that I would finish this quilt and give it to her for Christmas.

I played a little trick on my Mom to throw her off. I am a big supporter and volunteer for the United Way and my original plan was to complete this quilt for our 2015 campaign and have it  raffled off. HOWEVER ... time managed to get away from me and I was no where close to having it completed in time for the end of the campaign. So I decided to complete it for Christmas and present it to my Mom. (I knew she would love and cherish it)

The funny part is I never let mom in on the little fact that I was no longer doing the quilt for United Way. She would ask me how the quilts coming along and when can she buy raffle tickets. I may have even told her at one point I got her raffle tickets and not to worry. (a little white lie, but I think it was necessary).


Check out the great quilted swirls. Really adds depth - and possibly a little bit of the twilight zone.


 So I am told this quilt will be living on the living room wall in Mom and Chef's house. That makes me a tad bit nervous, reasoning being now people will REALLY be looking at it. Hopefully no quilt police come around! They might just get kindly kicked out of the house ha-ha Just Joking.


And so concludes our lil' gifted quilt post.
Please leave a comment we love hearing from our readers.

Until next time

 - The Youngest -


Thursday, December 24, 2015

Cozy Infinity Scarfs - 30 Minutes or Less

Oh the weather outside is frightful
But the fire is so delightful
And since we've no place to go
Let It Snow! Let It Snow! Let It Snow!
***
Tis' the season - the holidays are upon us. With the holidays comes a whirl wind of activities! Plays, projects, shopping, parties ... I could go on. With all that said I know I have slacked a bit and have not written a blog post for almost a month. How times flies.
 A lot has happened in December, a few projects got started and some even were completed !!!
Also there were some great visits with family and friends.
This may be a long post ... so grab a nice warm egg nog and settle in ☺
***
December started out with my BF heading off to the mountains for one of his annual sled trips. With him gone this was the perfect time to work on some projects, get the Christmas shopping done and  spend some quality time with my Mom.
We decided to make a weekend of it, mom packed her overnight bag and was ready to go. As usual we had to start with something girly - this included getting a manicure and pedicure ☺ my favorite.
Next we had some fabric shopping to do - I needed to pick out some material for infinity scarfs. I have wanted to make these for a while and thought they would make great Christmas presents.
Below is the fabric that we picked out for the scarfs. Three nice warm flannels.


I think I have read all the online tutorials imaginable for infinity scarfs. For the most part they were all basically the same, with small differences here and there. What it boiled down to was taking an infinity scarf I already had and loved and measuring it to get the measurements we used.
For these scarfs the fabric measurements were - 2m x 0.35m.


Once we had the fabric cut we then sewed the two longest sides together (right sides together)
You will end up with a 2m long tube
 Now this is the tricky part to explain !!!
You will need to place your hand in the tube you just sewed together and grab the other end.
Once you have that end in your hand you will pull it back through to the top of the tube.
Stop when the bottom end and the top end of the tub meet.


Your tube will now be 1m in length and all you will be ale to see will be your "wrong sides"
You will need to match up the ends and sew all the way around joining the top to the bottom.
Make sure to leave a small opening.
You will place your hand in that small opening, go all the way to the bottom and grab the fabric and turn it right side out.


Lastly you will need to stitch closed that small opening you left open to turn your fabric.


We had to try a couple times to get a thread that worked with all the different colours.
This nice brown is the thread that we choose. 


I am very happy with the final product and they took all of ~20 minutes give or take some time for the hand stitching. The fabric cost $50 and I was able to make 10 scarfs. So in total each scarf cost about $5 each. These are quick and easy for Christmas presents and don't break the bank.
Let us know if you make your own infinity scarfs and if you have any tips or tricks.

Love to hear from you!
- The Youngest