Saturday, November 28, 2015

Dull and Dingy to FABULOUS - Ironing Board Cover

 
I have finally settled into my NEW sewing room and I am loving it. I have everything just where I want and as a result I have been sewing a heck of a lot more. It's become a little oasis of creativity ☺
 
However the more I sew the more I notice how our Ironing Board really needs a makeover. This ironing board has been all the way from the East coast to the West coast and then some.
 
It really is showing its age. It is looking rather sad and stained. I like to have a few projects on the go at one time so I decided WHY NOT I'll make a cover for the dull dingy ironing board.


I went to pick out some fabric that would spice up that drab ole' ironing board. I nailed it down to the three choices below.
 
 
Choice # 1
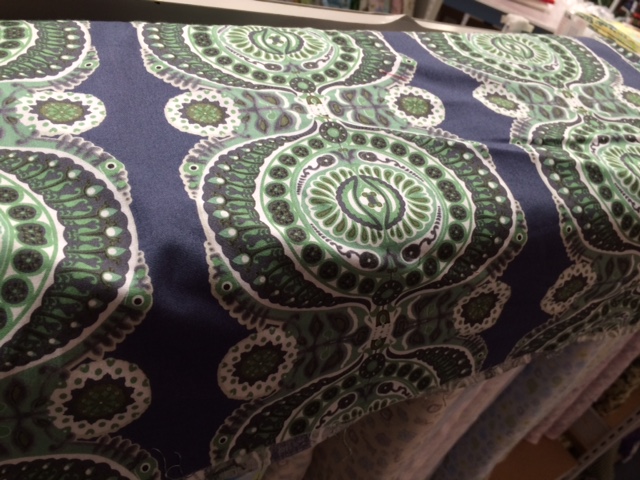


Choice # 2


Choice # 3
 
Ding Ding Ding ... Winner Winner Chicken Dinner


After a quick tutorial from the master (Mom) I was ready to go. I'm sure you could have been more precise than I was but I didn't think anyone would really bend down to see the bottom of my ironing board so I didn't see the point.

Supplies
-   2 meters fabric (I used quilting cotton)
-   Batting - enough for 1-2 layers (I kept the old cover and batting on for extra padding)
-   3 meters of 1/4" elastic
-   Basic sewing supplies

How To
Step 1 - Iron your fabric.
Step 2 - Lay out your fabric and place your ironing board on top.
Step 3 - Cut your fabric out, cutting  3" - 4" away from your ironing board.
Step 4 - Cut your batting using the ironing board as a template.
           - Cut the batting so that when pulled down it covers the edges of the ironing board.

As you can see below I was not all to precise (it really isn't too big of a deal)


Step 4 - Fold your raw edge over and sew approx. 1/4" the entire way around your cover.
           - Mine was a bit more than 1/4", that's okay.
           - Sew around the curves the best you can, you will need to slightly pleat your fabric as you go.
           - You will know what I mean when you get to the curved parts.
 
Step 5 - Fold your nicely sewn section over ~1" this will form a pocketed area .
           - This is where your elastic will go.
 
Step 6 - Sew 1/4"  around, try to keep your casing wider then the size of your elastic.
           - Leave about 1" opening at the end so you can feed your elastic in and around.
 
 
Step 7 - Feed your elastic in through your opening
           - Make sure you do not let your elastic tail go in as well or you will have to start over again
 
 
Step 8 - Place your cut batting on the ironing board ensuring the edges are covered as well.
           - I kept the old cover and batting on for extra padding as well.
           - While holding onto the two ends of your elastic, stretch your cover over your ironing board
           - Now with your cover over the board, pull the elastics as tight as you can, making sure that
              the new cover in completely covering the board and all the edges.
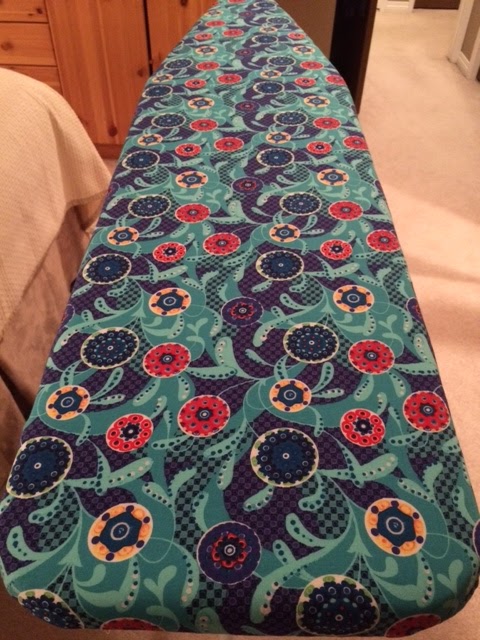
           -  It should look something like the picture below.
 
Step 9 - When you can no longer pull the elastic any more tie the elastic ends together with 3 - 5
              tight knots. This will ensure the elastic will stay together and tight.


Step 10 - Step back and admire your new ironing board cover ☺
 
I am very happy with how my new cover turned out and it was so simple and easy. It honestly took me no time at all. The longest part was trying to choose a fabric I liked.
 
Now my tutorial isn't the most precise however here is a link to a really good tutorial for this project. They used bias tape to form the pocket instead of my folding technique, etiher way works.


Hope you enjoyed my litte project!
Don't forget to comment - we love hearing from you
 
The - Youngest
 

Tuesday, November 24, 2015

Dog Gone CUTE


I was browsing through some quilt blogs when I came across a Blog Hop by Sew Fresh Quilts. I was instantly enamoured with the Dog Gone Cute quilt. Without a second thought I knew I had to try my hand at this quilt.

Now a blog hop is a big commitment and I did not want to be tied down to any time lines. So instead of signing up for the HOP I purchased the pattern from Sew Fresh and decided to work at my own pace.


I found some fat quarters from an online Canadian fabric store Fridays Off specifically for this quilt. The customer service of Fridays Off was excellent and there are some really great fabric options on there, for a reasonable price.I find it hard to find online fabric shops that will ship to Canada without it costing me an arm and a leg.

Fridays Off offers $5.95 shipping anywhere in canada and orders over $125 ship free !!! That sold me right there. Oh and to top it off when I got my package in the mail there was a darling hard written note. Way to make a customer Happy! Way to go Fridays Off !!! Happy Customer right here

Before I started the Dog Gone Cute quilt I had one more baby quilt I needed to finish as there was a dead line ... the baby was about to arrive! You can see that quilt in the "Winner of a Quilt" blog post which was posted earlier this month.

Check out my fabric choices below - can't wait for it to all come together.


 _________________________________________________________________________________
 
Like any other sew day I called my Mom up last minute and invited myself over. The deal was that if we are doing a sew day I needed to do her hair first. She got new rollers and wanted to test them out. I begrudgingly agreed ... I say begrudgingly only because if you have tried to put rollers in your hair with those darn pins it is a big pain in the B . U . T . T!

Alright lesson learned my Moms rollers are high tech and WAY better than the older style ones. They heat up fast, easy to put in and make amazing curls.

PS. FAMILY - I would like to add these rollers to my Christmas List ☺☺


With the hair done we now started on cutting all the fabric for the Dog Gone Cute Quilt. We worked out a system where Mom read the instructions and I cut the fabric.

The hardest thing I find when cutting fabric from a pattern is I always end up going back and forth from the pattern to the fabric. The whole "Measure Twice, Cut Once" idea. Well I second guess myself and end up measuring for about 5 minutes per cut. Having a reader and a cutter makes the whole cutting process go by a heck of a lot faster.


In one afternoon we managed to get all the background, ears and nose fabric cut + one patterned fabric for one dog. In the below picture you can see the first dog we selected to do.

We used the highlight as you go method. As we cut we highlight so we do not end up duplicating cuts that have already been made. This seems to work well for me.

In the initial layout of the pup (below) he looks more like a gremlin instead of a Cute Dog ha-ha.


This quilt is a work in progress. I am taking my time, trying to match up those points the best I can. As usual my seam ripper has become one of my best friends. My BF knows I have made a mistake when he hears the machine abruptly stop followed by several grumbling sounds.


Pup One- When I saw the final block I was like a kid hearing an ice cream truck in summer


Pup Two - One of my favorite fabrics from my Fridays Off purchase


Pup Three - This is the BFs colour choice


 Pup Four - For some reason I found this one the trickiest so far (I may have been tired at this point)


This one is so cute I am going to keep it for myself.
Stay tuned for the completed quilt!
If you would like to see other projects from some fellow bloggers check them out HERE .
And don't forget to leave us a comment !!! We love hearing from you


Sunday, November 15, 2015

Teddy Bear Diapers

It was one of those days where the BF and I didn't have any big plans so I decided to head down south to my Moms for a sew day, leaving the BF to work in the garage (he could be in there all day anyways). This day turned into more of a cutting day for me but all the same it was great.

My mom had a small project she wanted to work on for the little man. Due to the limitations with her hand she is only able to do certain things and for short periods of time. My Moms physiotherapist is a genius she has worked out how she can do her at home therapy while doing something she enjoys *SEWING*. I thought this was so clever!

Here's an example. One of the exercises she has to do is take her pointer finger to her thumb, sounds easy ... trust me after her surgery it is anything but. You start to dread your exercises when they are painful. However take that same exercise and put two pieces of fabric in between your fingers and line up the edges, much better. You are still completing your exercise however now you at least have nicely lined up fabric to show for it.

On this sew day my Mom was was creating these cute little fabric diapers for the little mans teddy bears, doing double duty by working out her hand.  So she instructed and I assisted, worked out well.

First she took a simple template, placed it on folded fabric (she used flannel) and cut out the shape, she did this twice with 2 different types of flannel.

Next she lined up the two cut flannel pieces (right sides together) using that pointer finger to thumb exercise and sewed all the way around leaving a small opening to turn the fabric.Then she turned the flannel right side out and TA DA, the makings of a teddy bear diaper.


Once flipped so the right sides are out she sewed all aound the diaper, ensuring to nicely secure the once existing hole where the fabric was turned.


My mom decided for the fanciers she was going to use Velcro. It was definitely comical watching her try to peel the Velcro apart. I shouldn't laugh but it was funny. Finally she looks at me and say "I may need your help" I took one end of the Velcro and she took the other in her good hand and we pulled it apart.

A little more sewing and the teddy bear diapers were all done. Lastly was the final fit test!

Mom was gone and back in a flash with "Ryan" the little mans teddy bear. The teddy diapers went on and sure enough are extremly adorable. I might have to whip up a couple of these for our cute little neighbours little dollies.


Saturday, October 31, 2015

The "WINNER" of a quilt


Have you ever made a quilt and you had all the best intentions in mind. You had the perfect fabric and the perfect pattern ... it really was going to be a winner of a Quilt!
 
Well I had the "Winner" of a quilt a few years ago. I had this stash of fabric just sitting in my closet waiting to be transformed. I just needed the right project for it.
 
A year or two goes by and this fabric just sits and sits and sits, patiently waiting. Then BAM my mom gets an Accuquilt. The gates of heaven have opened and there is the inspiration I needed. I go over to see what this new "gadget" is all about.
 
I learned very quickly that the accuquilt is amazing and I needed one ASAP. The accuquilt is a cutting system which allows you to cut fabric 90% faster without having to use your rotary cutter. Basically you take your fabric and place it on a die. The dies has metal blades that form your desired shape (flower petals, 2x2s, you name it). So you place the fabric on the die, run the die through the rollers and TA DA your end product is perfectly cut fabric.
 
There are many many designs you can get. My mom had the tumbler die and that's what I choose to use for my "Winner" of a quilt.
 
Below is the "Winner"... alright so now, after it was all put together I stood back and looked at the finished product. What do you know ... I HATED IT! I could not stand how it turned out one bit. I felt defeated after finishing it not elated.  So this quilt now sits in my closet waiting for its next home.
 
 
 Alright alright so where am I going with this long rant about this "Winner" of a quilt?? Well after having a good ole' time using my Moms Accuquilt I went a little cutting happy. I ended up with a large amount of extra tumblers.  

Just to bring you up to speed I have just finished redesigning our front room and turned it into a sewing room. After I finished decorating I had to put away all the sewing gear I have collected throughout the years away. I hauled up box after box to the new sewing room and started to rediscover all the little treasures I have acquired.  I quickly found out I had way more scraps then I thought and tonnes of little baggies full of left over odds and ends from past quilts.
 
One of these odds and ends was a baggie full of excess tumblers from the "Winner" of a quilt. A light bulb went off and I knew I had to try the tumbler quilt again and hope to the high heavens that it wasn't a failure.
 
I did not have enough fabric to make a big quilt and I really did not want to have to go out and buy more fabric. So I settled on a baby quilt and what do you know everyone around me is having baby's (something is definitely in the water).
 
I convinced my Boyfriend to help me lay out the tumblers on the floor ... he grumbled while doing it but I really did appreciate the help and the extra set of eyes. I figured out what I disliked about the previous "Winner" of a quilt, it was how symmetrical it was. So this time I went random and with the help of my Love this is what we came up with. Much better in my opinion


Next was the border. In my stash I did not have any fabric that would compliment the tumblers so off to the store I went. It was difficult to match the tumblers so the mint green was the colour I choose. Not my first choice (I was leaning more towards pink) but the mint looks fantastic.


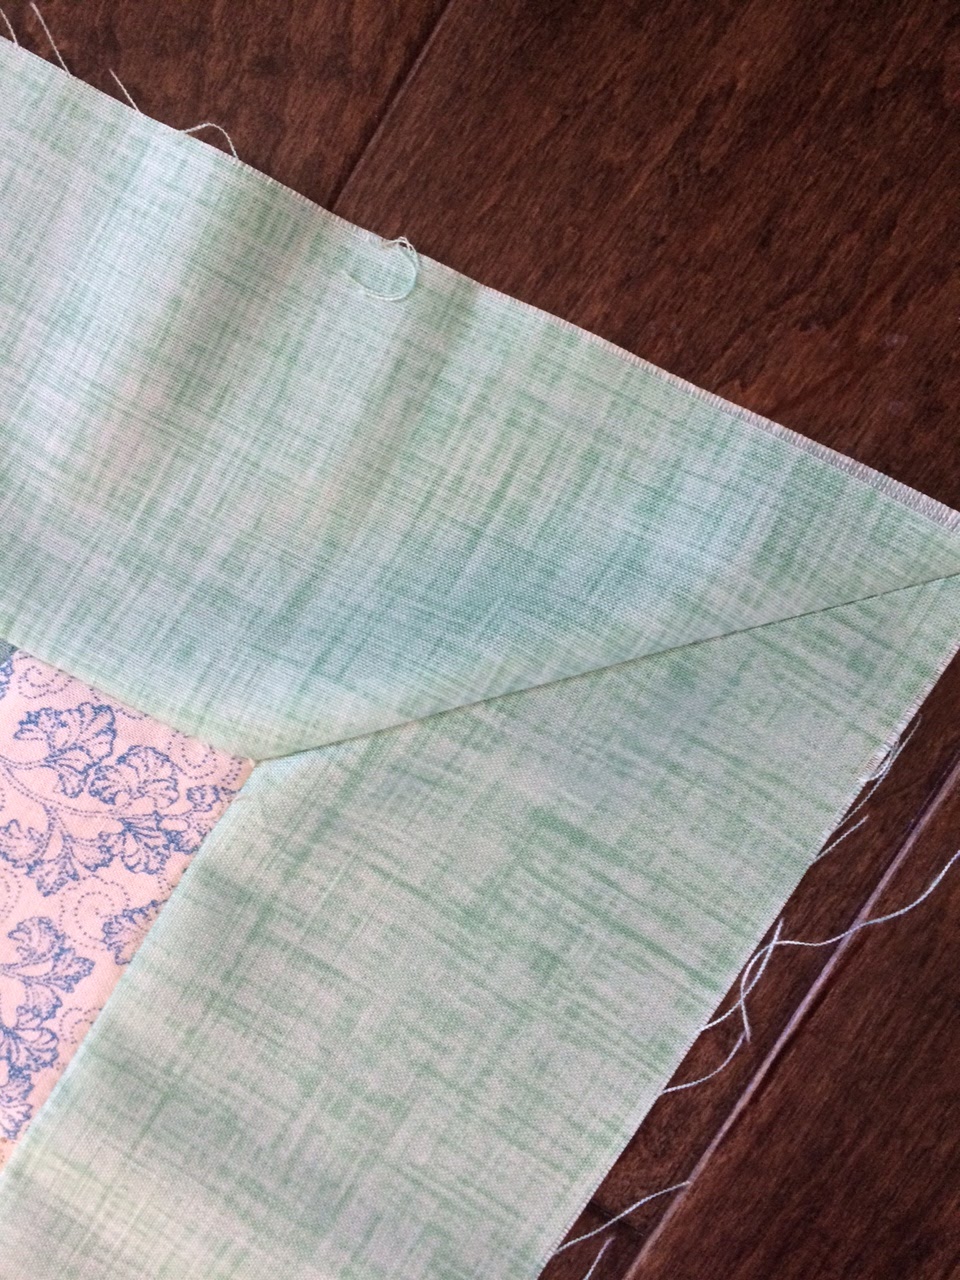
My attempt at mitered corners. I need some practice however I am slowly getting better with each attempt. A dozen more and I think I will have it down to a science!
 
 
I have yet to quilt my projects myself as my current sewing machine is no way capable. Once I save enough for my dream machine I will start learning how to quilt them myself. In the meantime I sent off this project to be quilted. I am so happy with the way it turned out ☺
 
All that was left was the binding. UGH hand sewing, however I really do believe this part is crucial and must be hand sewn. The finished quilts look more refined in my opinion.  OF course there are exceptions to this hand sewing rule. 


I had to put the above picture in because this thread has a little story to it!
 
My mom likes to share with me her sewing items, the ones she has extra off or no use for anymore. She is helping me build up my sewing room. One of the items she gave me was a box of misc. thread. This thread was in there and I am lucky it was a perfect match for this project.
 
The great part about this thread is that if you look closely it was chomped on ... by our family dog SAM. Sam was the best golden retriever and family dog you could ever imagine. As I was using the thread I smiled a little because I could not get this tiny image out of my head of Sam chomping down on Moms thread.


To help with the tedious task of sewing on the binding I used these great clips. My Mom got them for me for my Birthday. My Boyfriend thought they were hair clips when I first showed them to him. He caught on rather quickly when I gave him one of those "you got to be kidding me" looks.
Those little "hair clips" are a God send, my binding looks more uniform and it was less of a pain to sew on.


 Enough of my talking here is the end result. Check out the lily pad design on the back, I just adore it!


OH AND PS. THIS IS THE REAL WINNER OF A QUILT !!!
Until next time - The Youngest
Sunday, October 4, 2015

The Boy Sewer

I know I am not sewing...but look who is!


he said it would work better without his sock!

Teddy diaper!

Talented boy!

Keep on sewing all!
Margo